 VdoCipher
VdoCipher Iframe Embed Guide for Teachable, Thinkific, Kajabi & More
VdoCipher offers seamless integration with LMS platforms like Teachable, Thinkific, Kajabi, etc.
Embedding on a 3rd-party website, HTML page, or LMS isn’t much different from a normal iframe/script embed — but a few small issues can come up if it isn’t done properly. This guide walks you through generating a VdoCipher iframe code with all the security measures and embedding it correctly on third-party pages.
Video Tutorial
A video walk-through followed by a text + screenshot explanation. Go through either one to understand all the iframe embed settings.
Text + Screenshot Tutorial on Iframe Embed
In this guide we’ll cover iframe video embedding in Teachable, Thinkific, or any 3rd-party course-creator or website-builder platform. A few platforms have quirks that are resolvable, explained at the end of the article.
- 1. Iframe generation with all security settings
- 2. Iframe embed in Teachable
- 3. Iframe embed in other platforms (WordPress example)
- 4. Iframe embed in Thinkific
We’ve also done a detailed comparison on the 3 most commonly used LMS platforms — Teachable vs Thinkific vs Kajabi.
1Video Iframe Generation with VdoCipher
For any video that you host with VdoCipher, you’ll need to embed it somewhere to be able to use it. Once you’ve generated the embed code, you can add the video to your website, blog, article, or any third-party platform.
To allow embedding for a video, follow the steps below.
Step 1Visit vdocipher.com and create / log into your account
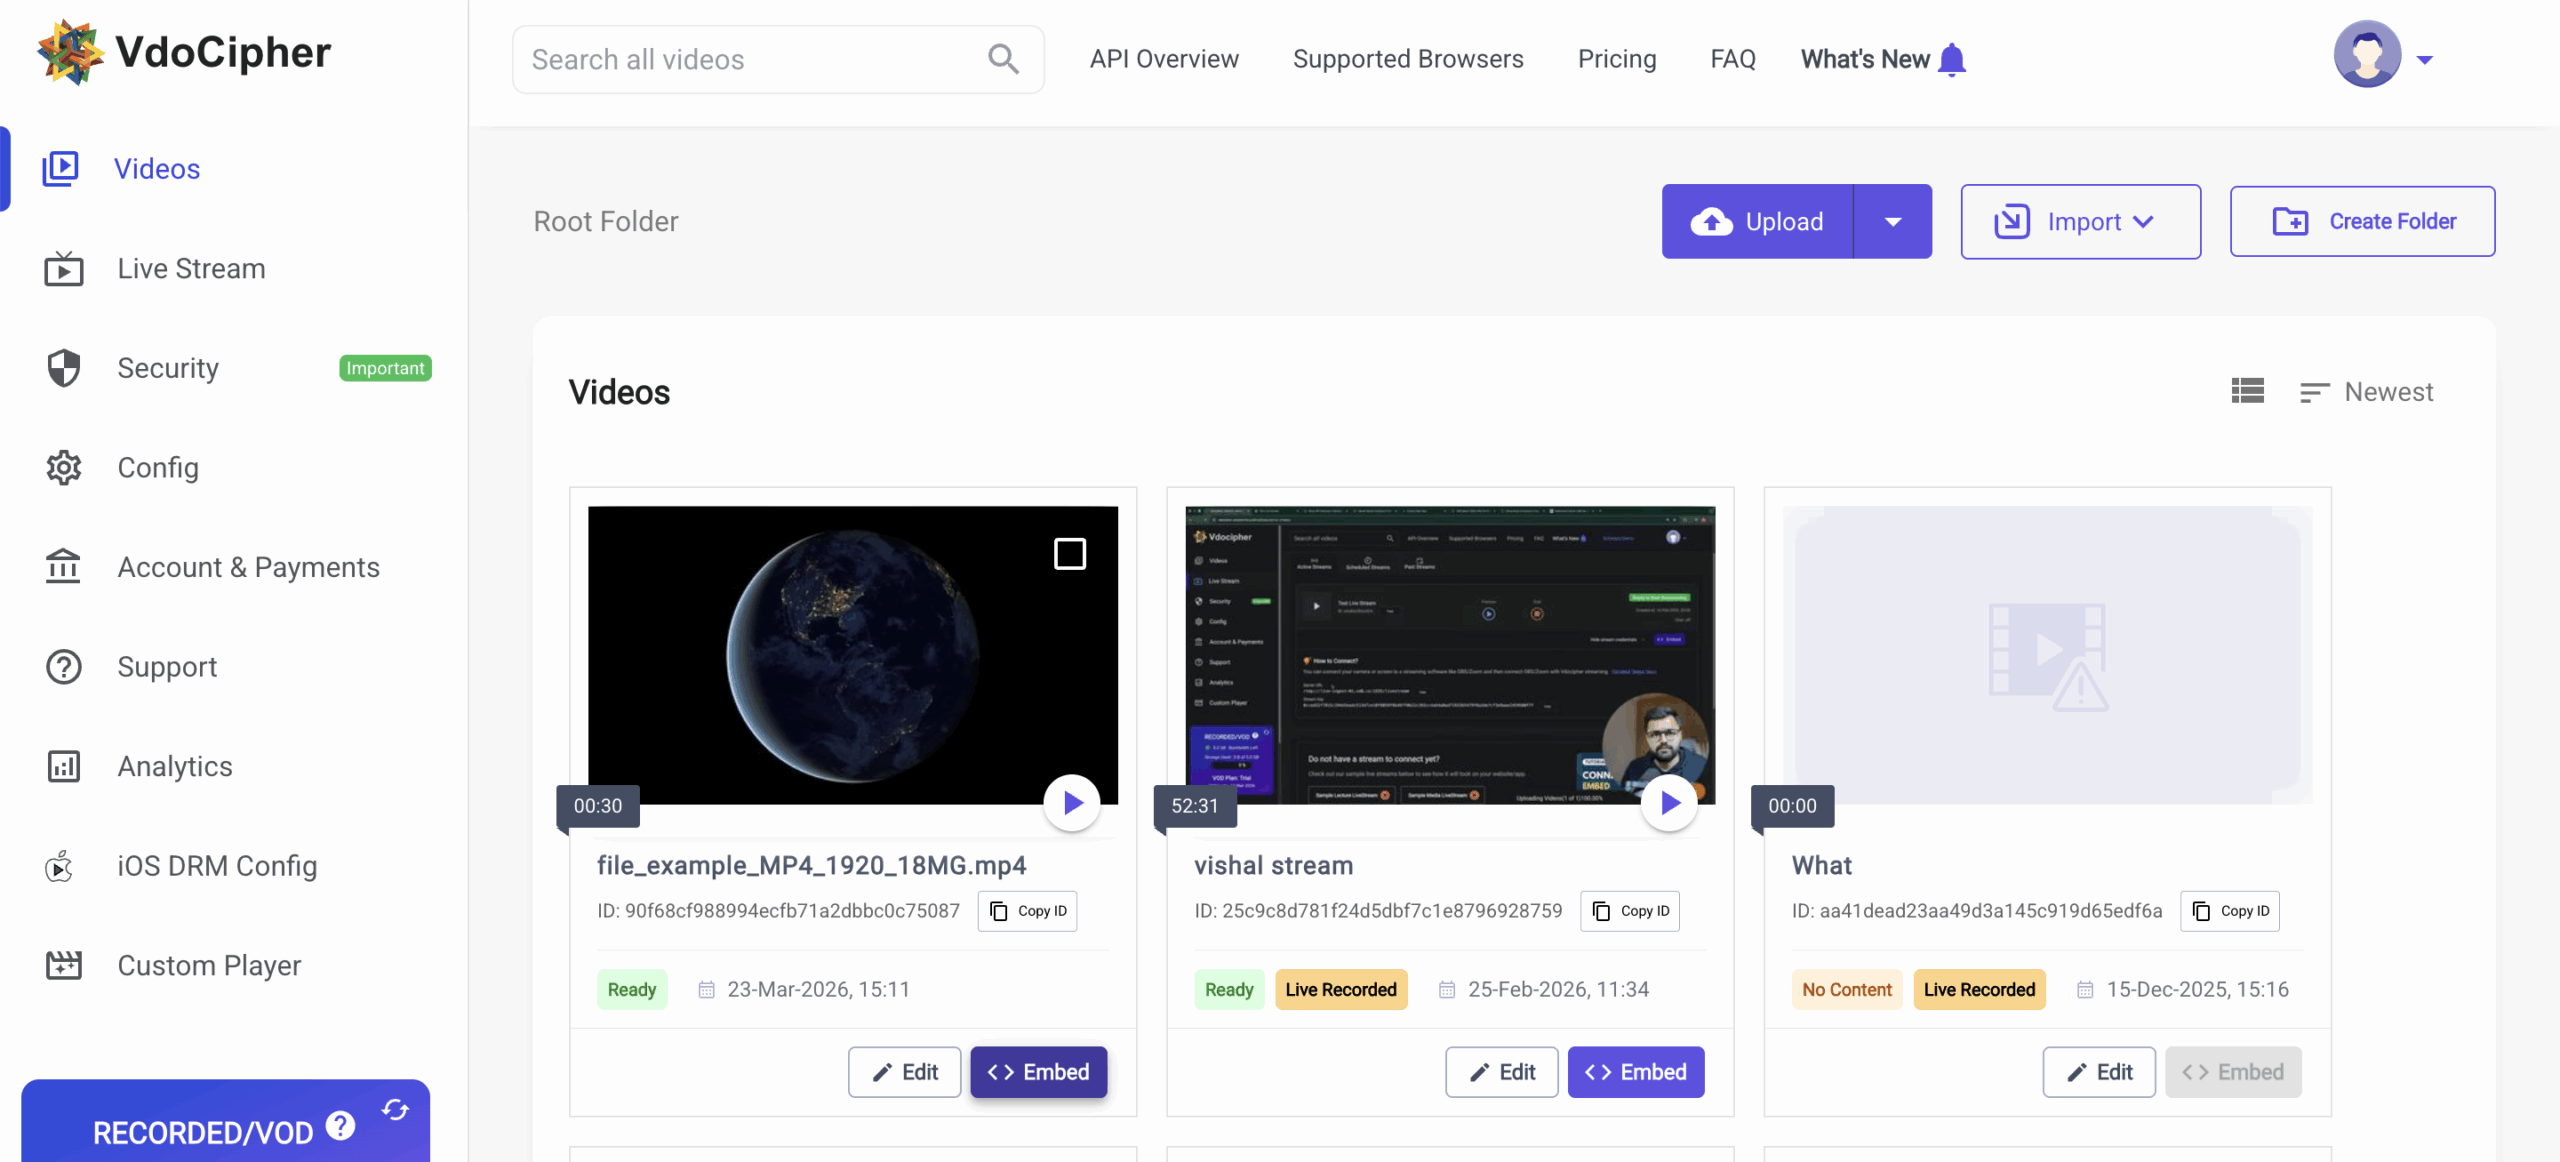
Step 2Open the VdoCipher dashboard and click “Embed”
After login you’ll land on the VdoCipher dashboard where you can see your videos. Click the “Embed” button against the video you want to generate code for.
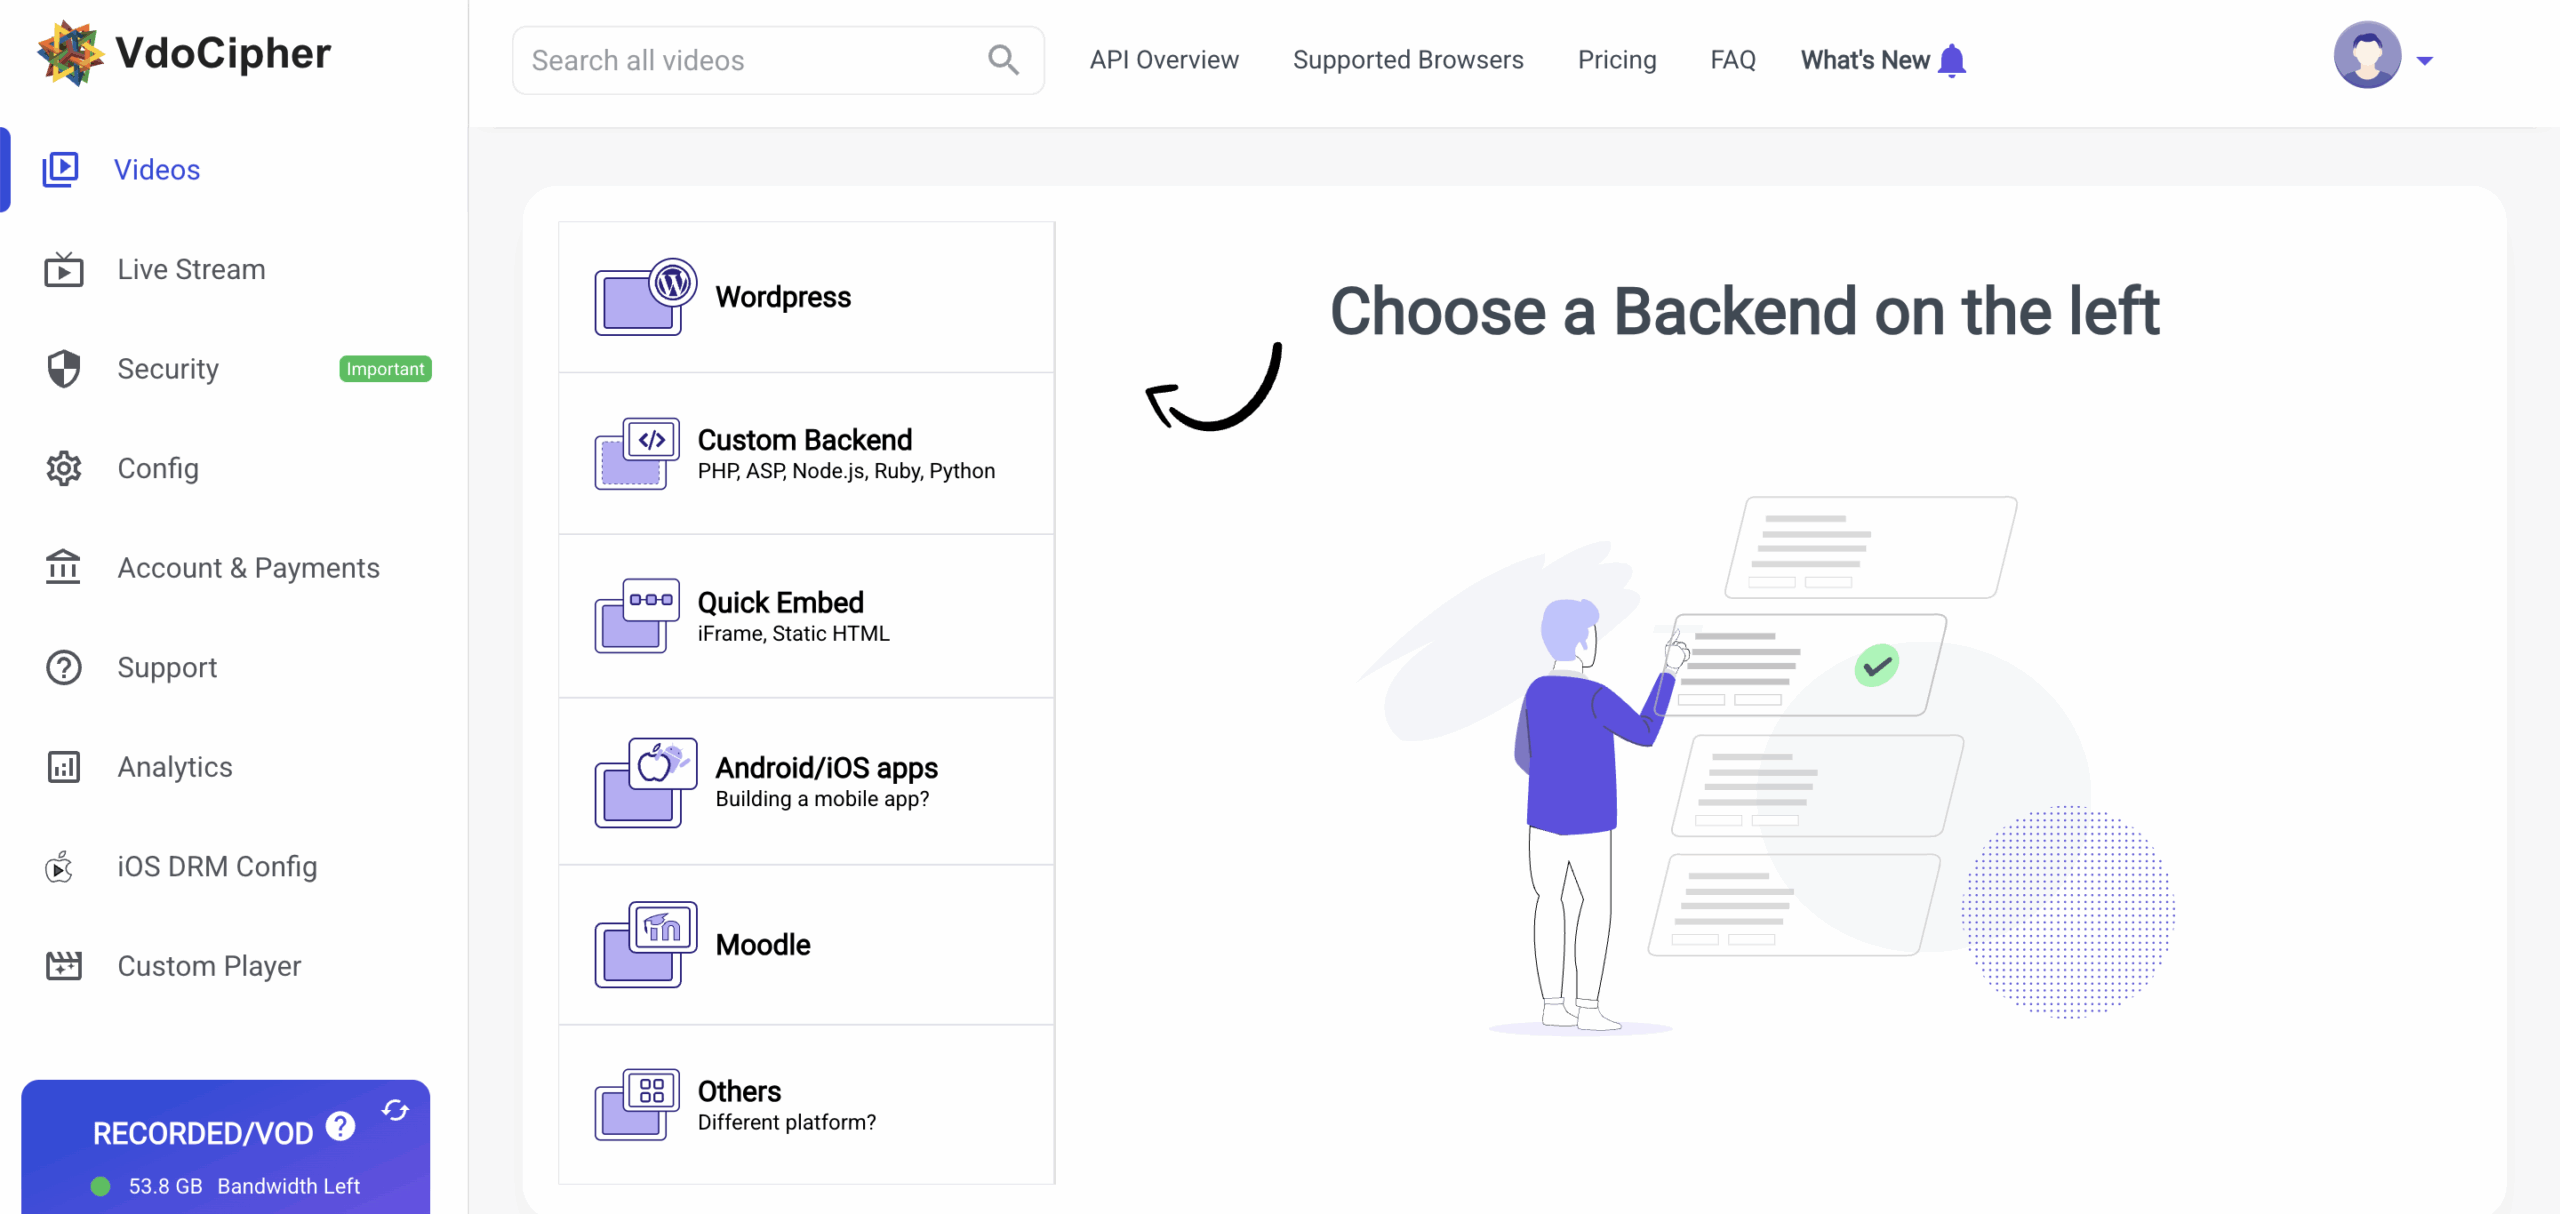
Step 3Choose “Quick Embed”
A popup appears asking you to choose the backend of your website or mobile app. For embedding via iframe, choose “Quick Embed”. Other options are the WordPress plugin, API integration, or SDK integration. Quick Embed is the right choice for HTML editors and 3rd-party platforms like Teachable.
Step 4Configure embed settings
After selecting Quick Embed, you can edit settings including embed expiry, IP restrictions, watermarking, and more.
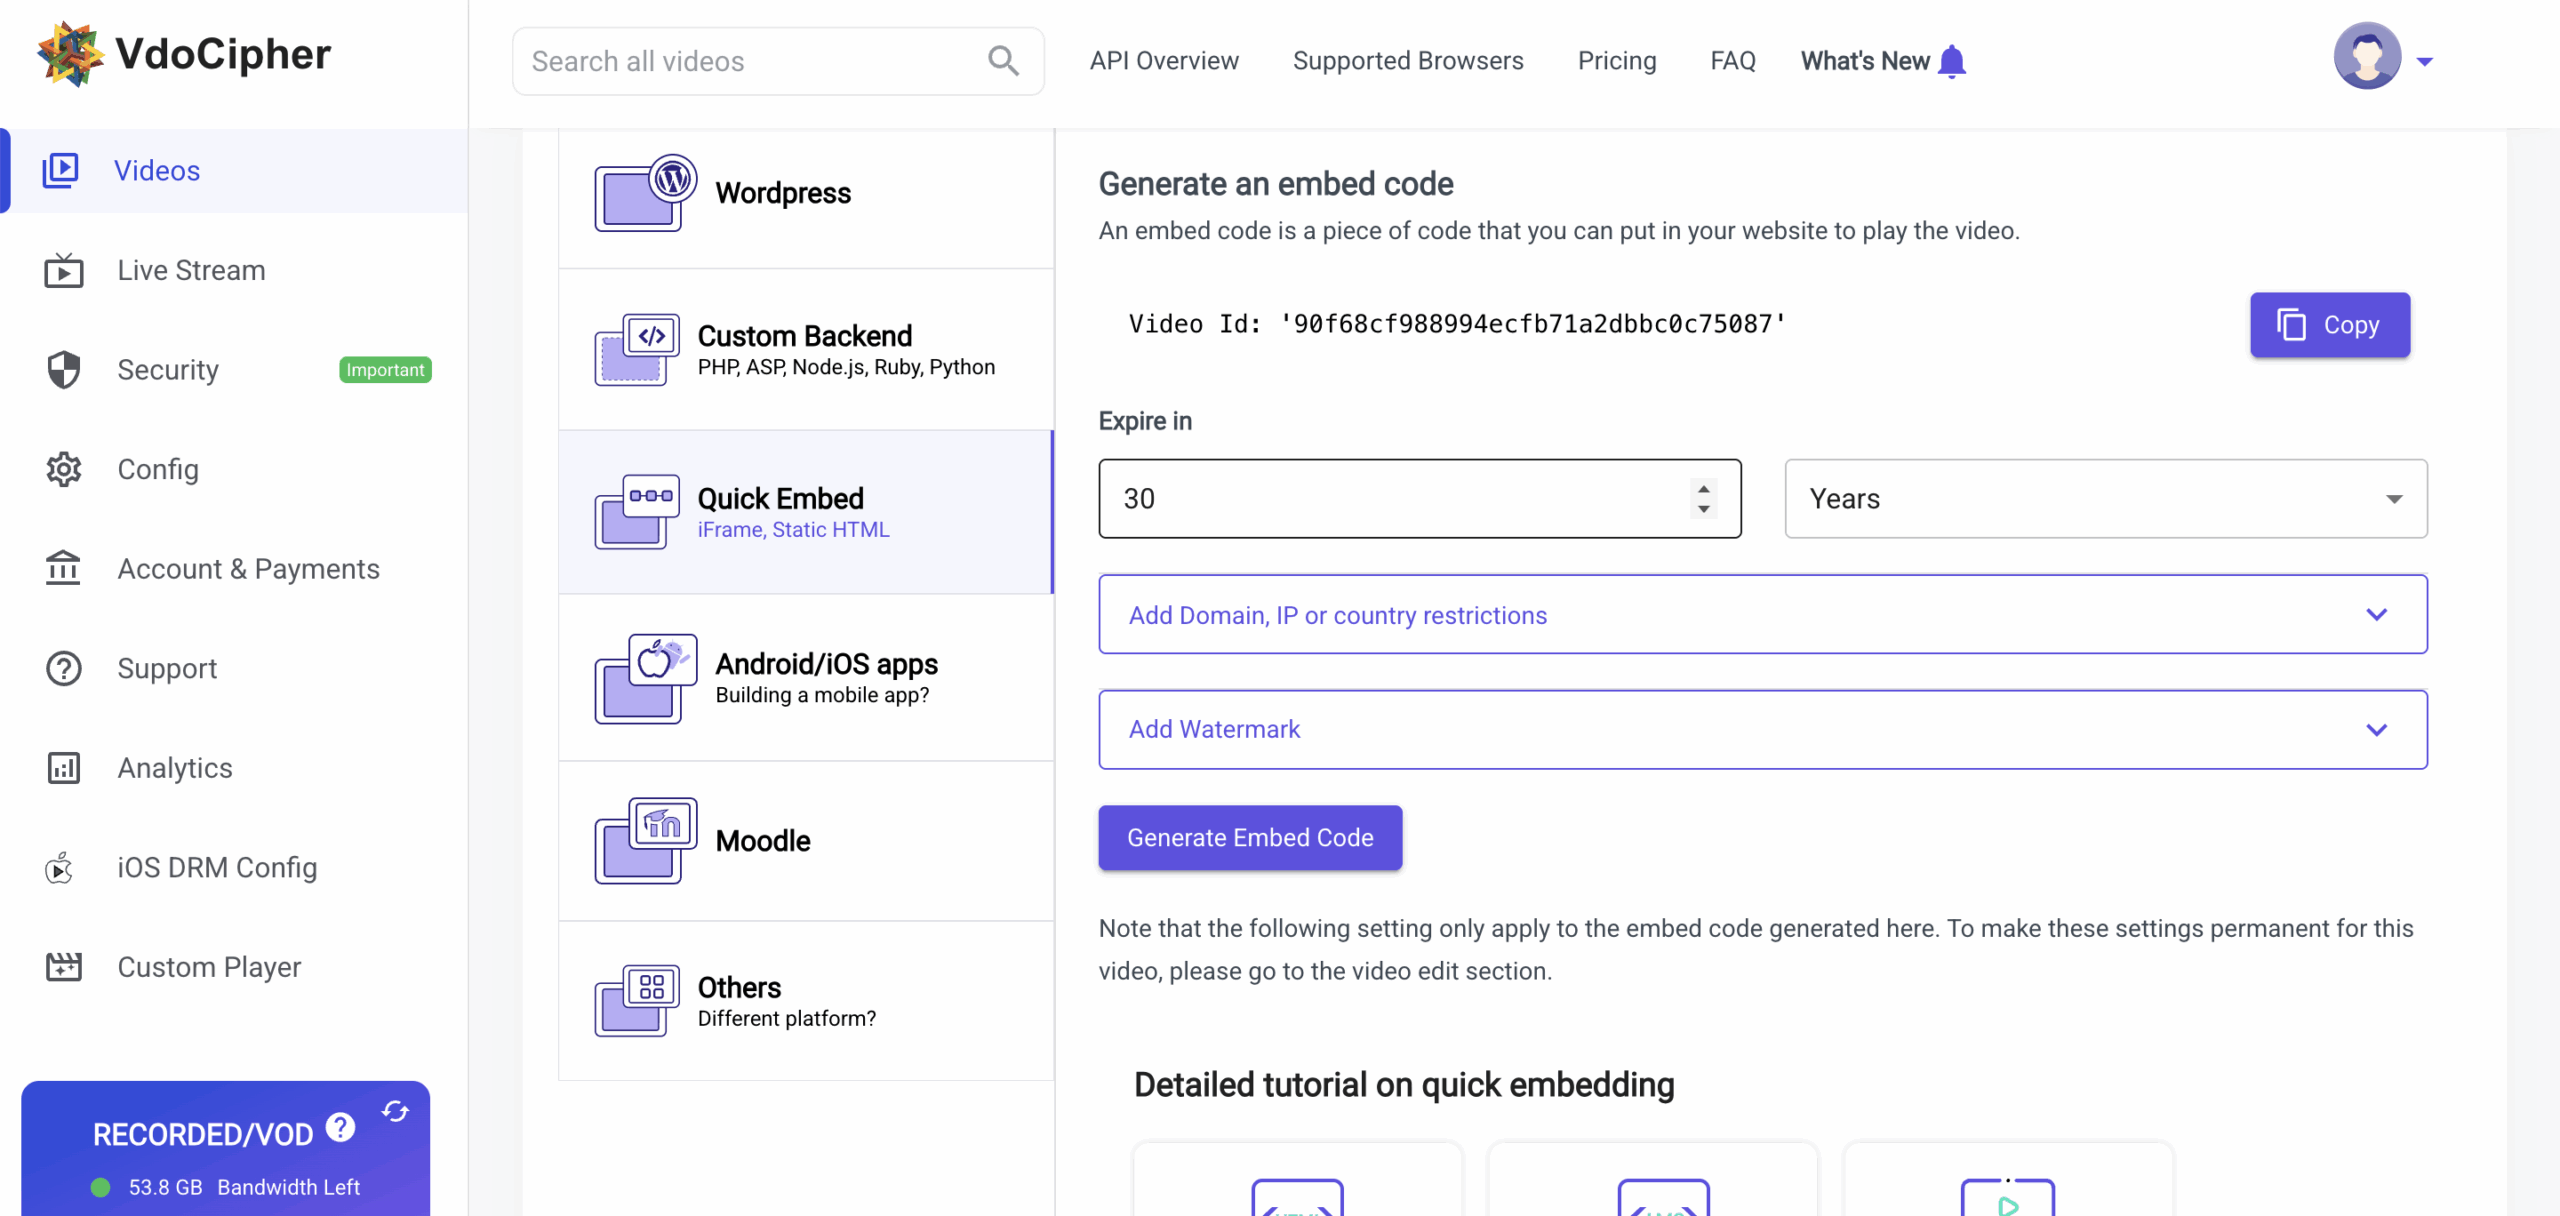
Each video can be used to generate multiple embed codes, and all of them can have different restriction settings.
- Expire In (Embed Code Expiry): the tenure of the embed code. For example, 30 years means the embedded video stays available for 30 years. Reduce as needed.
- URL Whitelist (Domain restriction): contains the site domain you want the video to play on, e.g. mysite.com. For multiple sites, separate with the pipe character without spaces — mysite1.com|mysite2.com|mysite3.com. Subdomains and paths like mysite1.com/course also work. For account-level domain restriction, visit the Config → Settings section. Account-level rules only apply to embed codes generated afterward; video-level restriction overrides account-level. Note: avoid www or http/https — mention the main domain only.
- Allowed IP: (optional) restricts the video to specific IP ranges — useful for colleges, offices, etc.
- Allowed Countries: (optional) leave blank for global access. To restrict, mention ISO country codes separated by commas, e.g. IN, UK, USA. Account-level country settings live in Config → Settings. For account-level blacklisting (instead of whitelisting), contact support@vdocipher.com.
Step 5Add a Dynamic Watermark (optional)
Click “Add Watermark” in the previous step to configure these options:
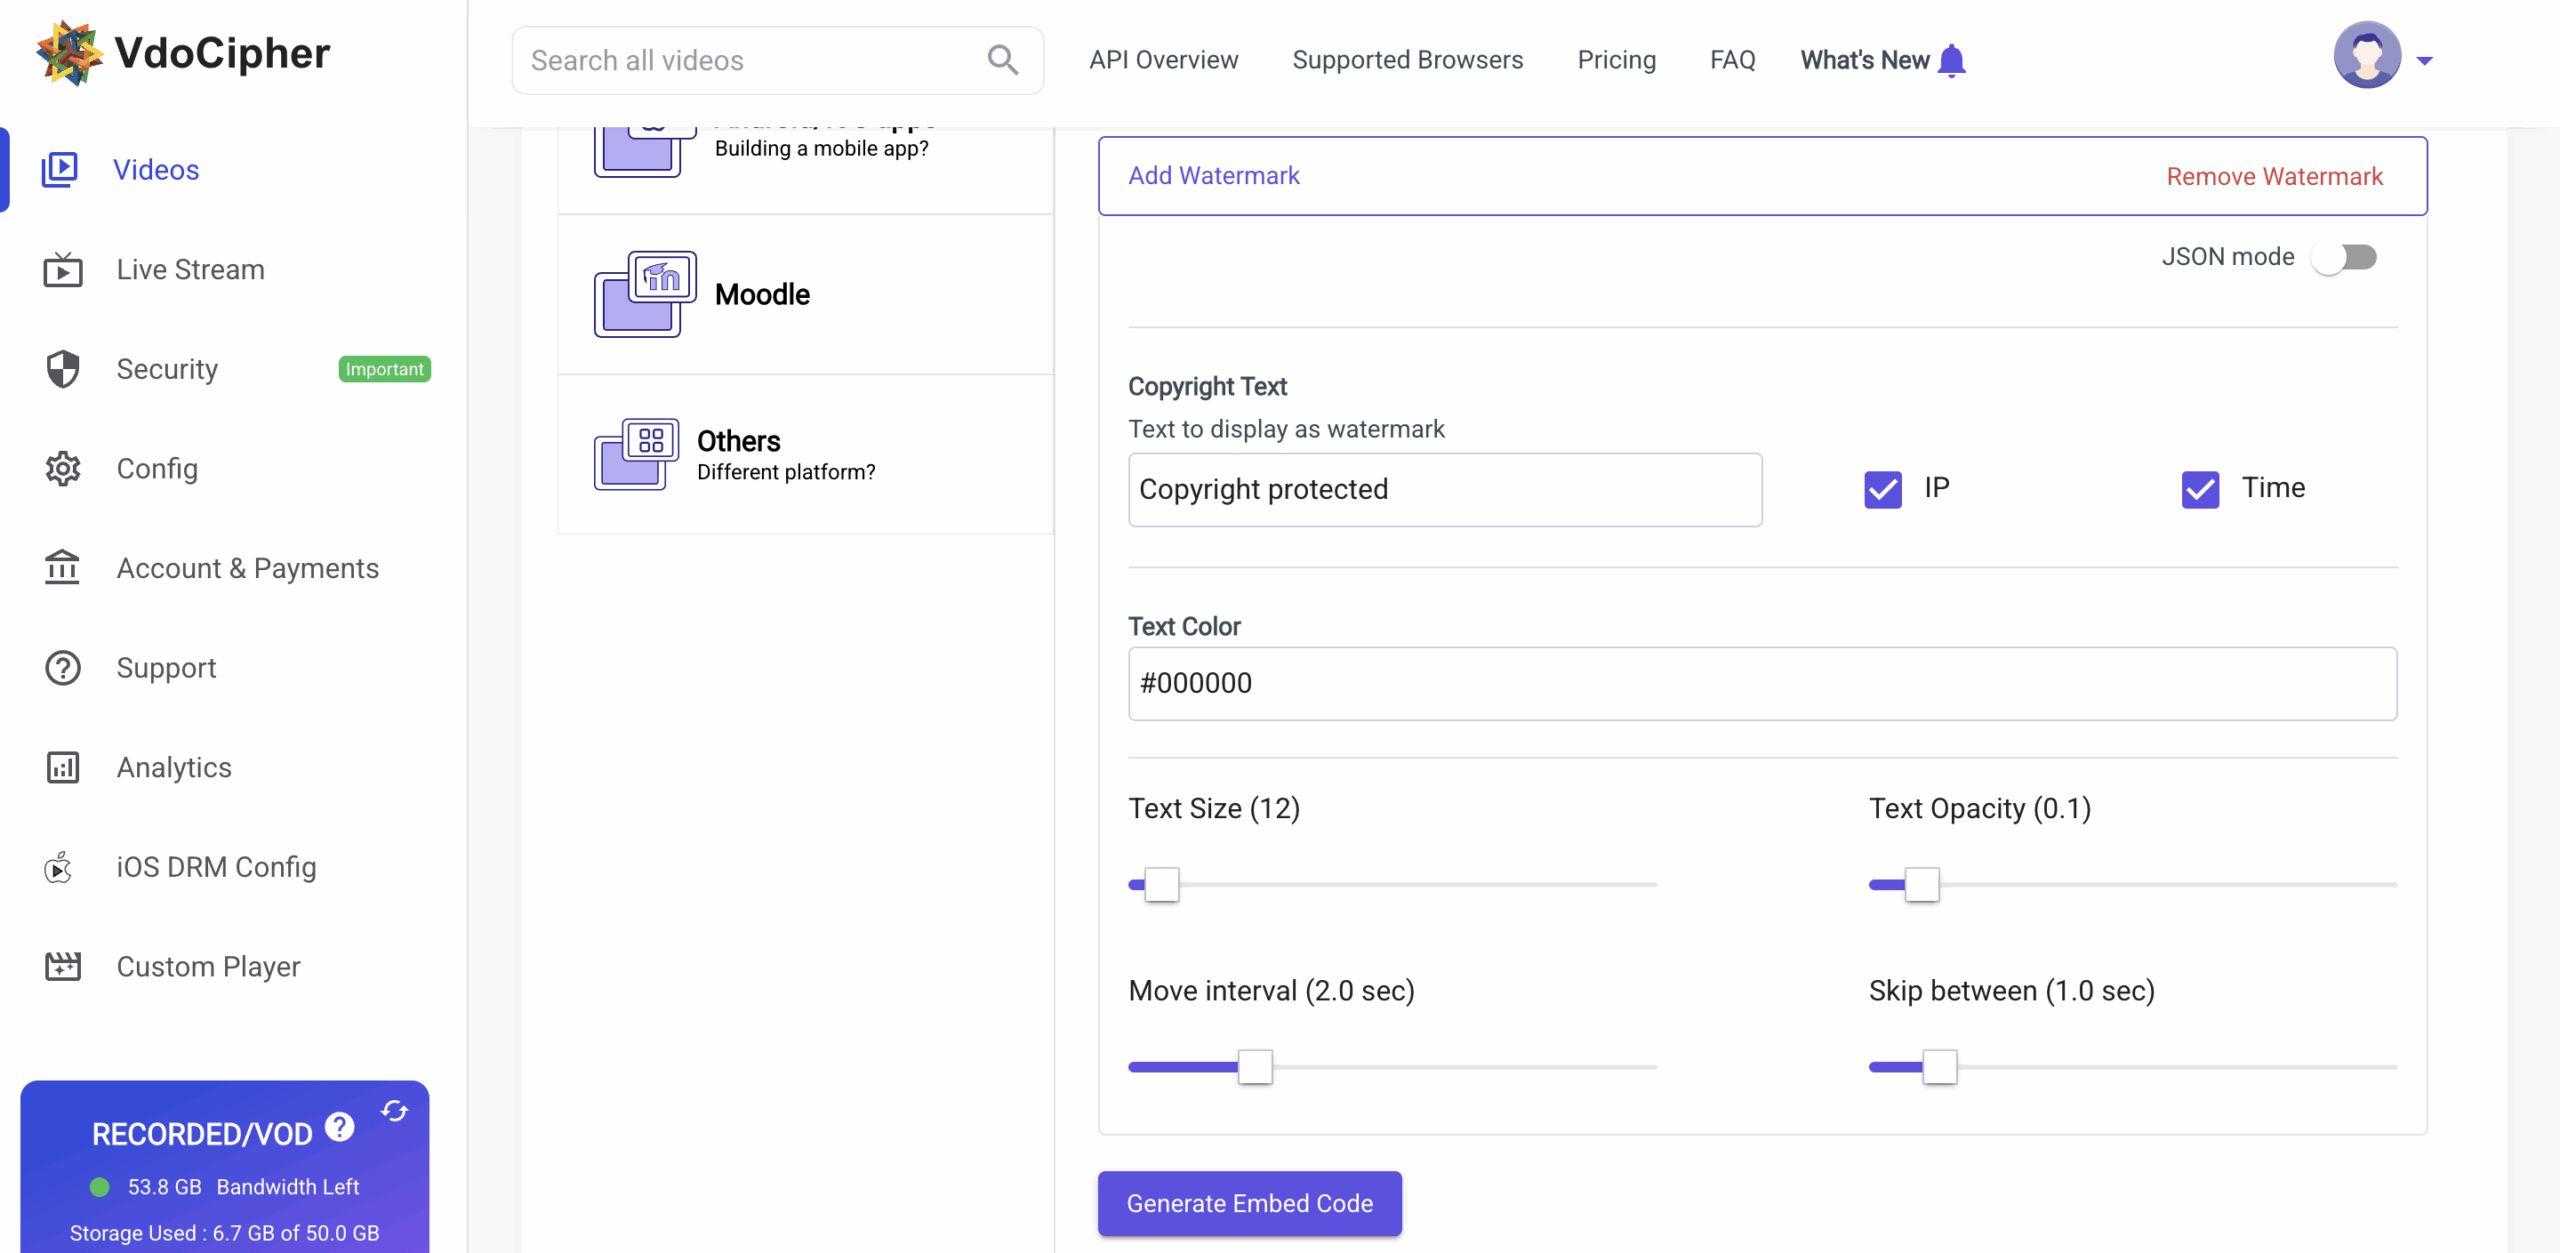
- Fixed Text: any text you want as a watermark like “Copyright protected”.
- IP / Time: checkboxes to include viewer IP and time on the watermark. Time uses GMT/UTC.
- Text Size: set with the seekbar.
- Text Opacity: 0 to 1 — lower is lighter.
- Text Color: enter a 6-digit hex code, e.g. #000000 (black), #ffffff (white).
- Move Interval: how often the watermark moves — lower is faster.
- Skip Between: time frames where the watermark is skipped.
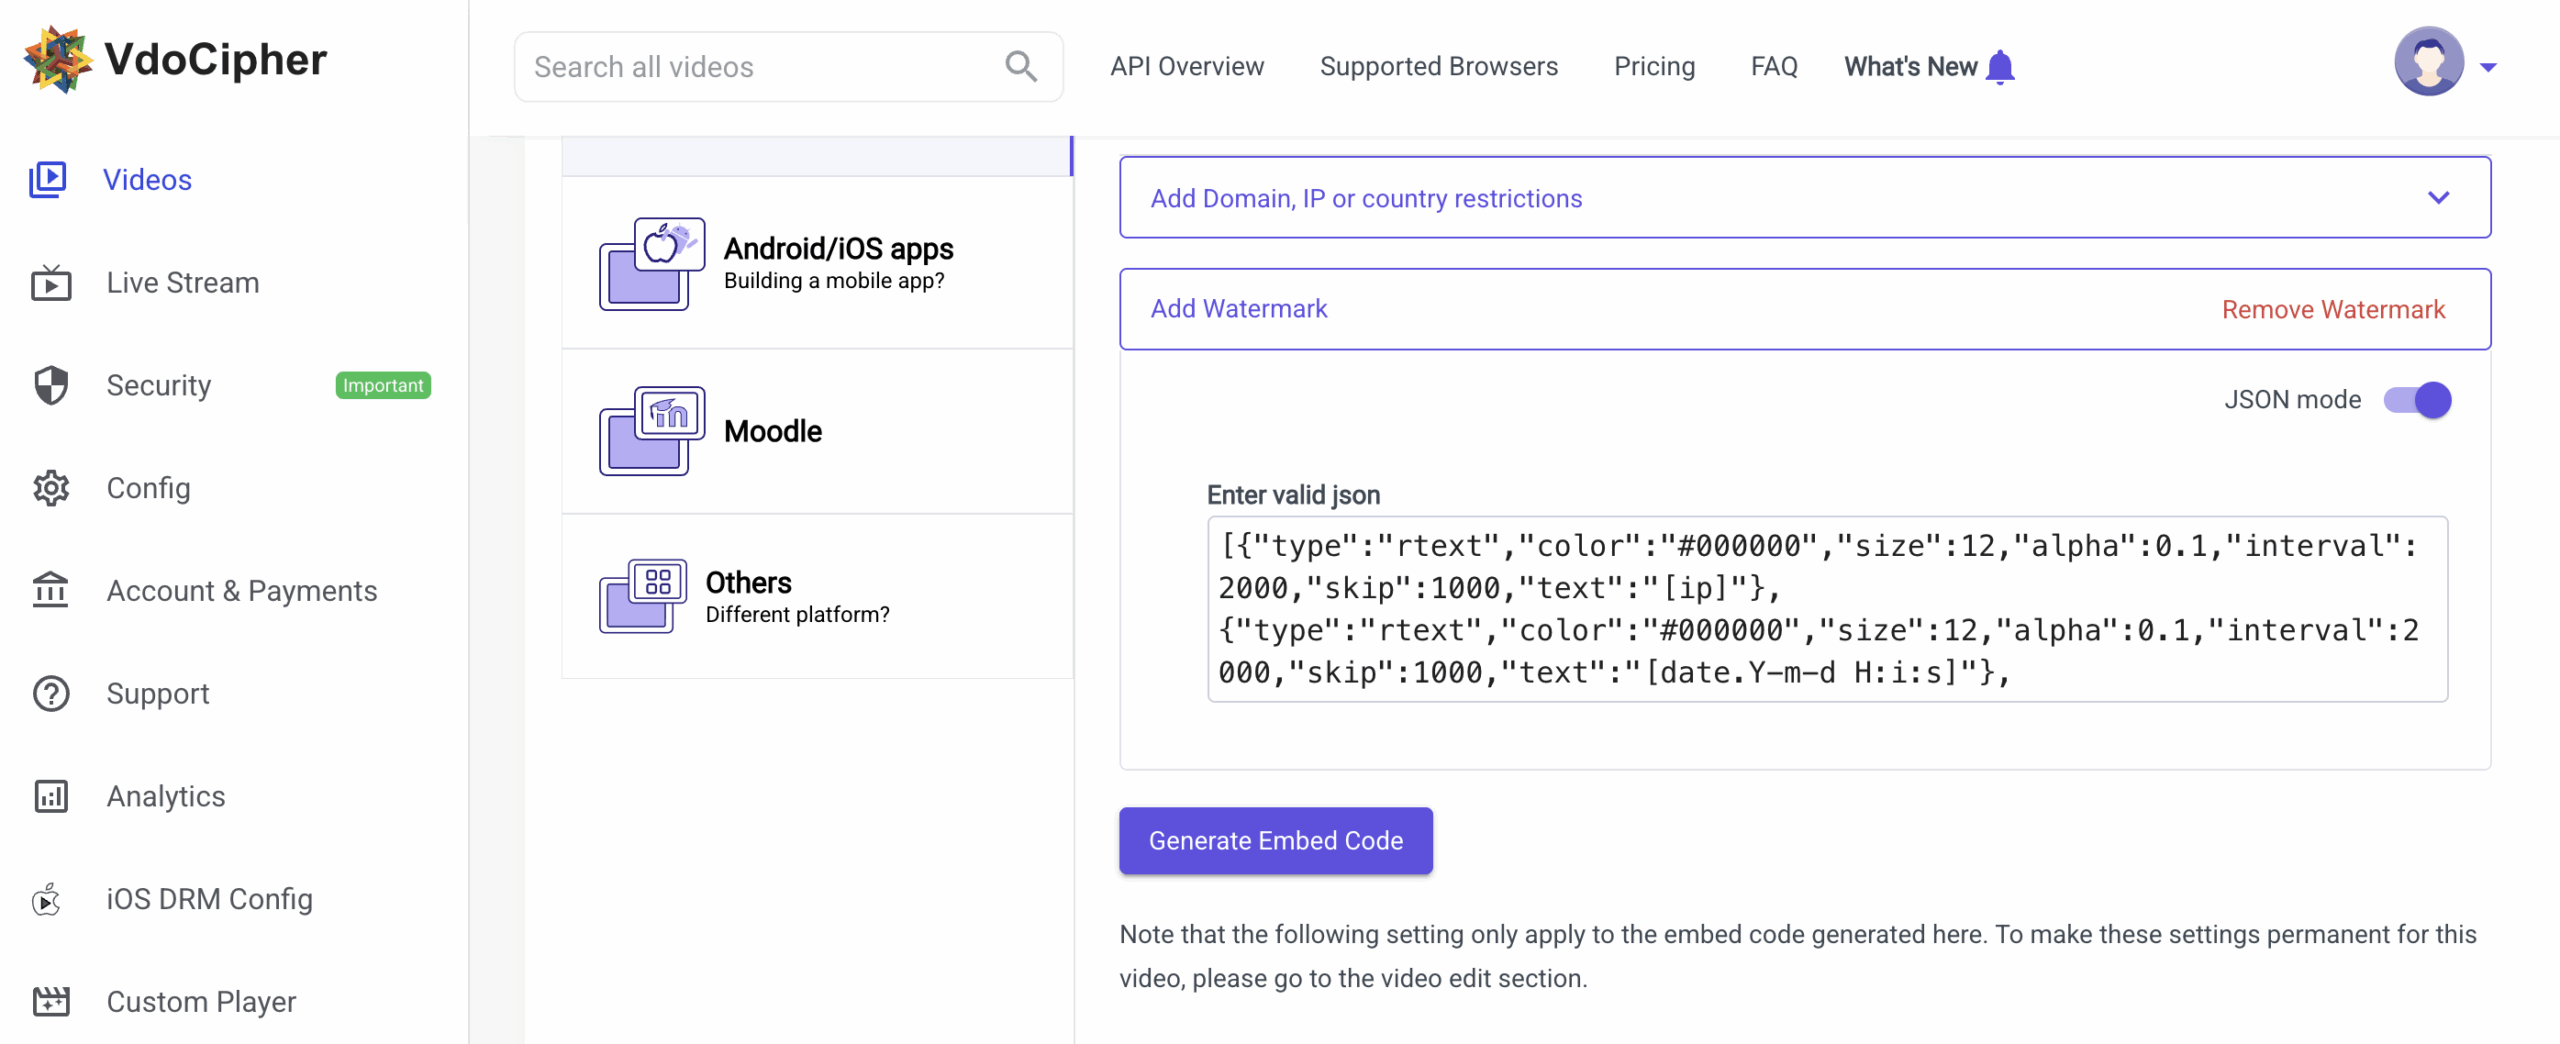
Once settings are done, click Generate Embed Code. For deeper customization, enable JSON mode — a JSON string appears that you can edit directly.
JSON tip — copy & paste watermark settings
The JSON code can be copied and pasted into any other video’s watermark settings. Configure once, reuse across every video.
Step 6Copy your embed code
After generating, you’ll see a Copy to clipboard option. The code is available as either an iframe or a script. Iframe works better in most cases; script may work in some.
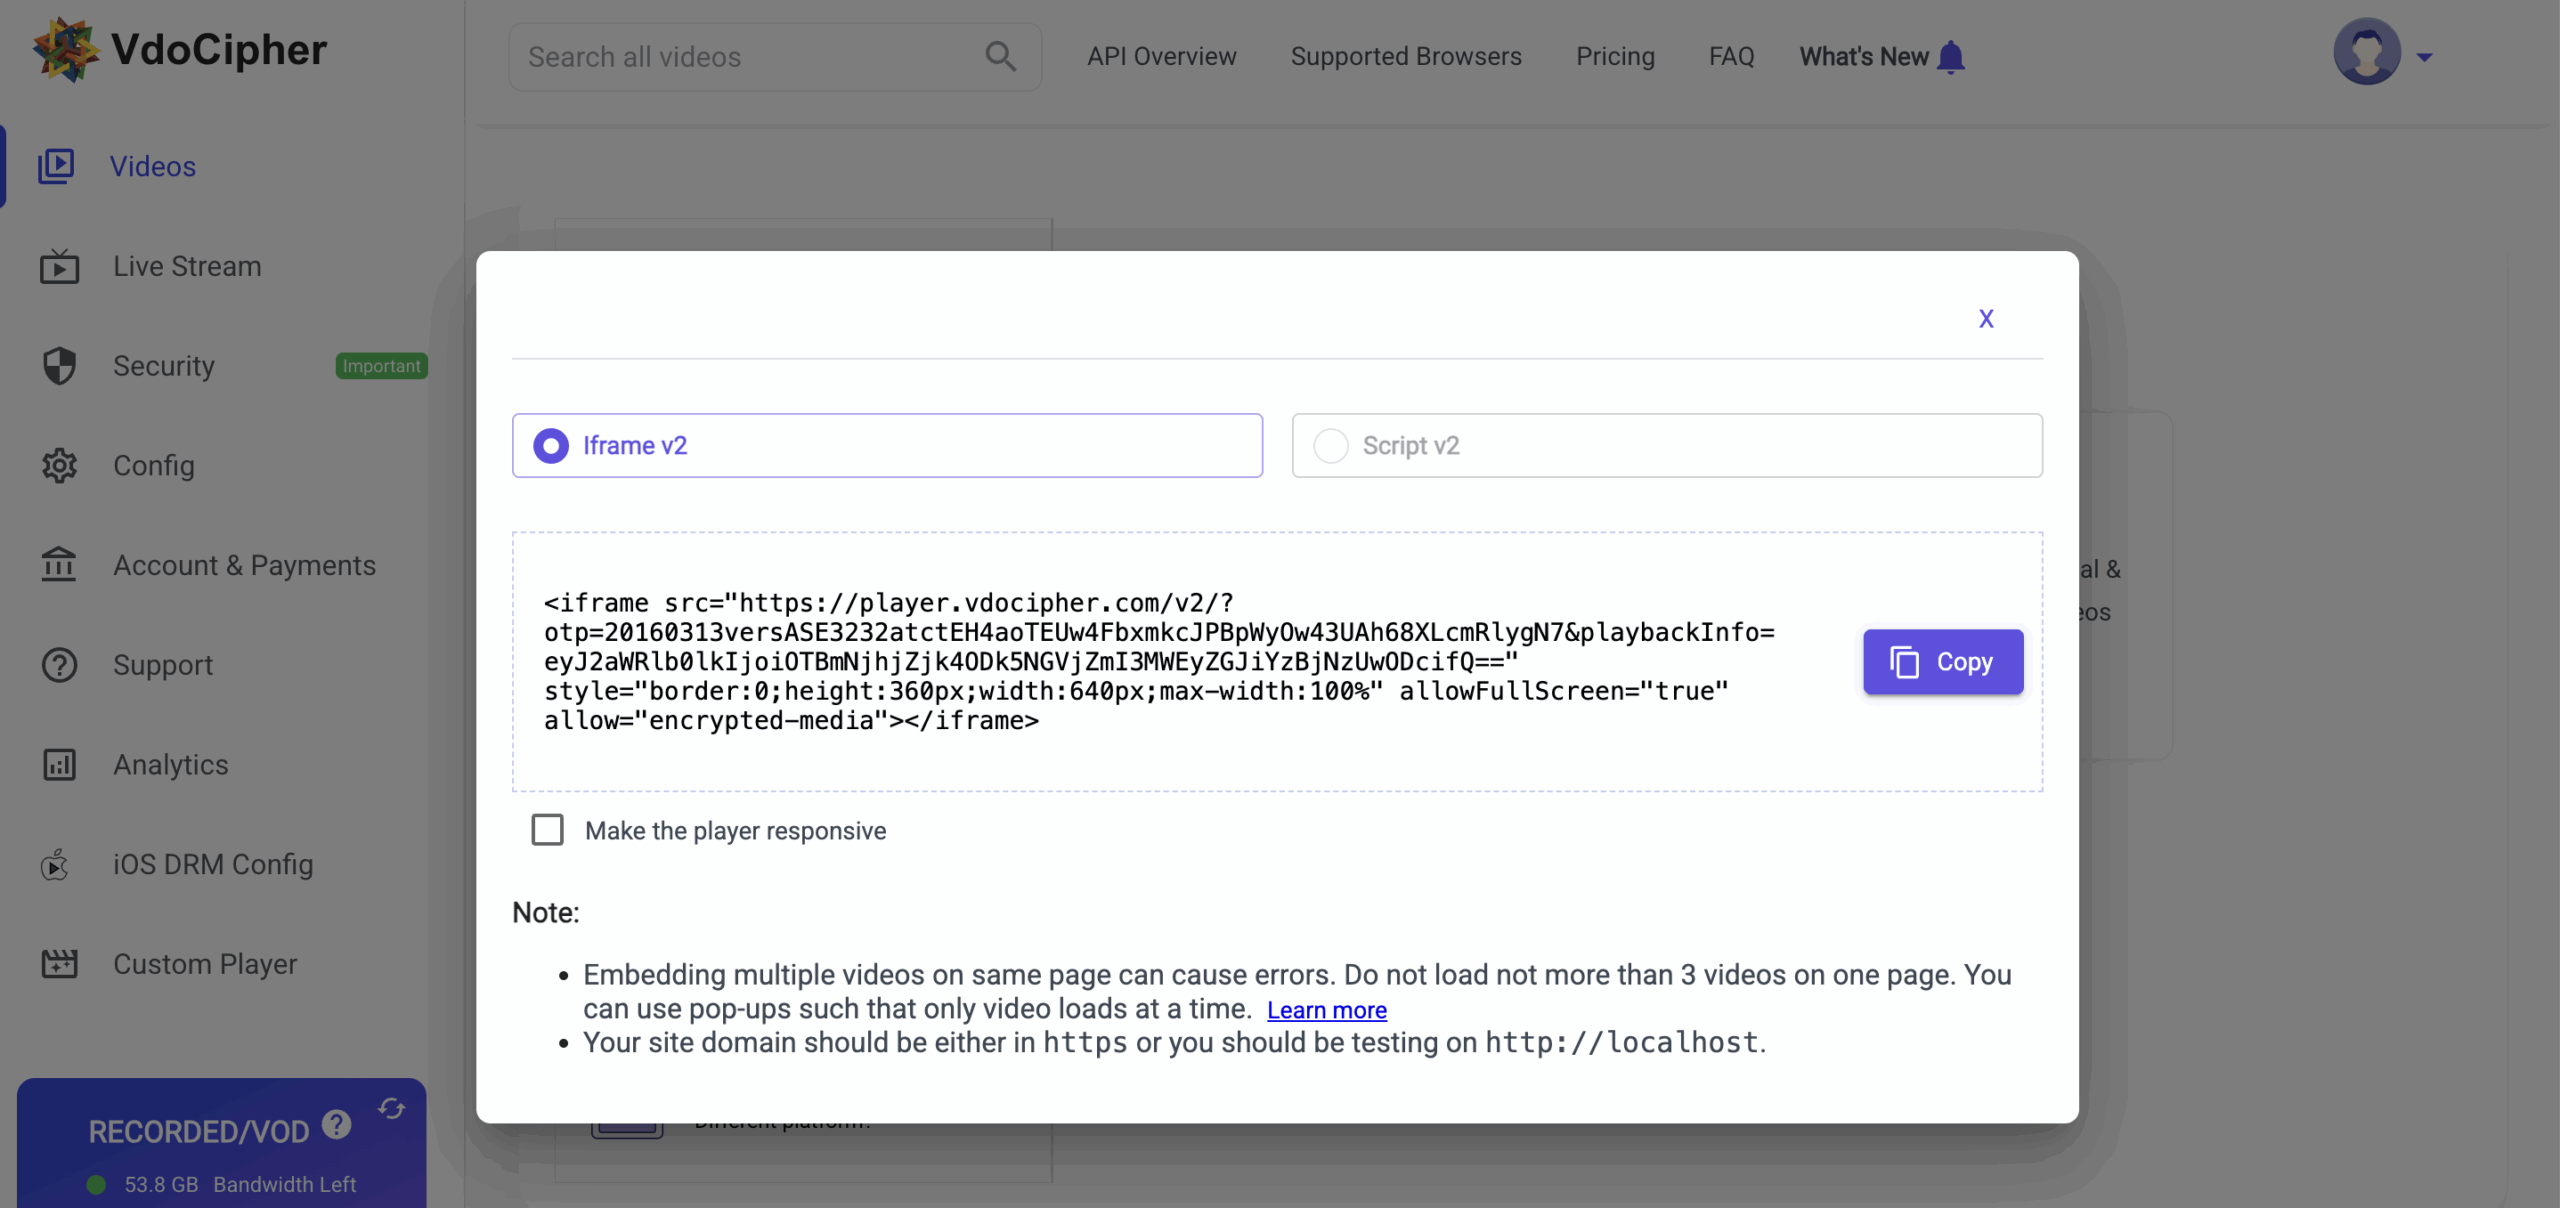
Sample Iframe
<iframe src="https://player.vdocipher.com/v2/?otp=20160313versASE3232q2AphzCeksMtnCzVHmXJKfIZ2yfyuWhdQPBZG3PRm3zJP&playbackInfo=eyJ2aWRlb0lkIjoiOTBmNjhjZjk4ODk5NGVjZmI3MWEyZGJiYzBjNzUwODcifQ==" style="border:0;height:360px;width:640px;max-width:100%" allowFullScreen="true" allow="encrypted-media"></iframe>
Be careful about iframe embeds — a common issue
The highlighted part above (
allow="encrypted-media") is something other providers like YouTube or Vimeo don’t include, because their content isn’t encrypted. While most platforms like Teachable publish the iframe as-is, some editors (like Thinkific’s) strip that part out and break playback. Details below.2Video Embed on Teachable
Step 1Visit teachable.com and create / log into your account
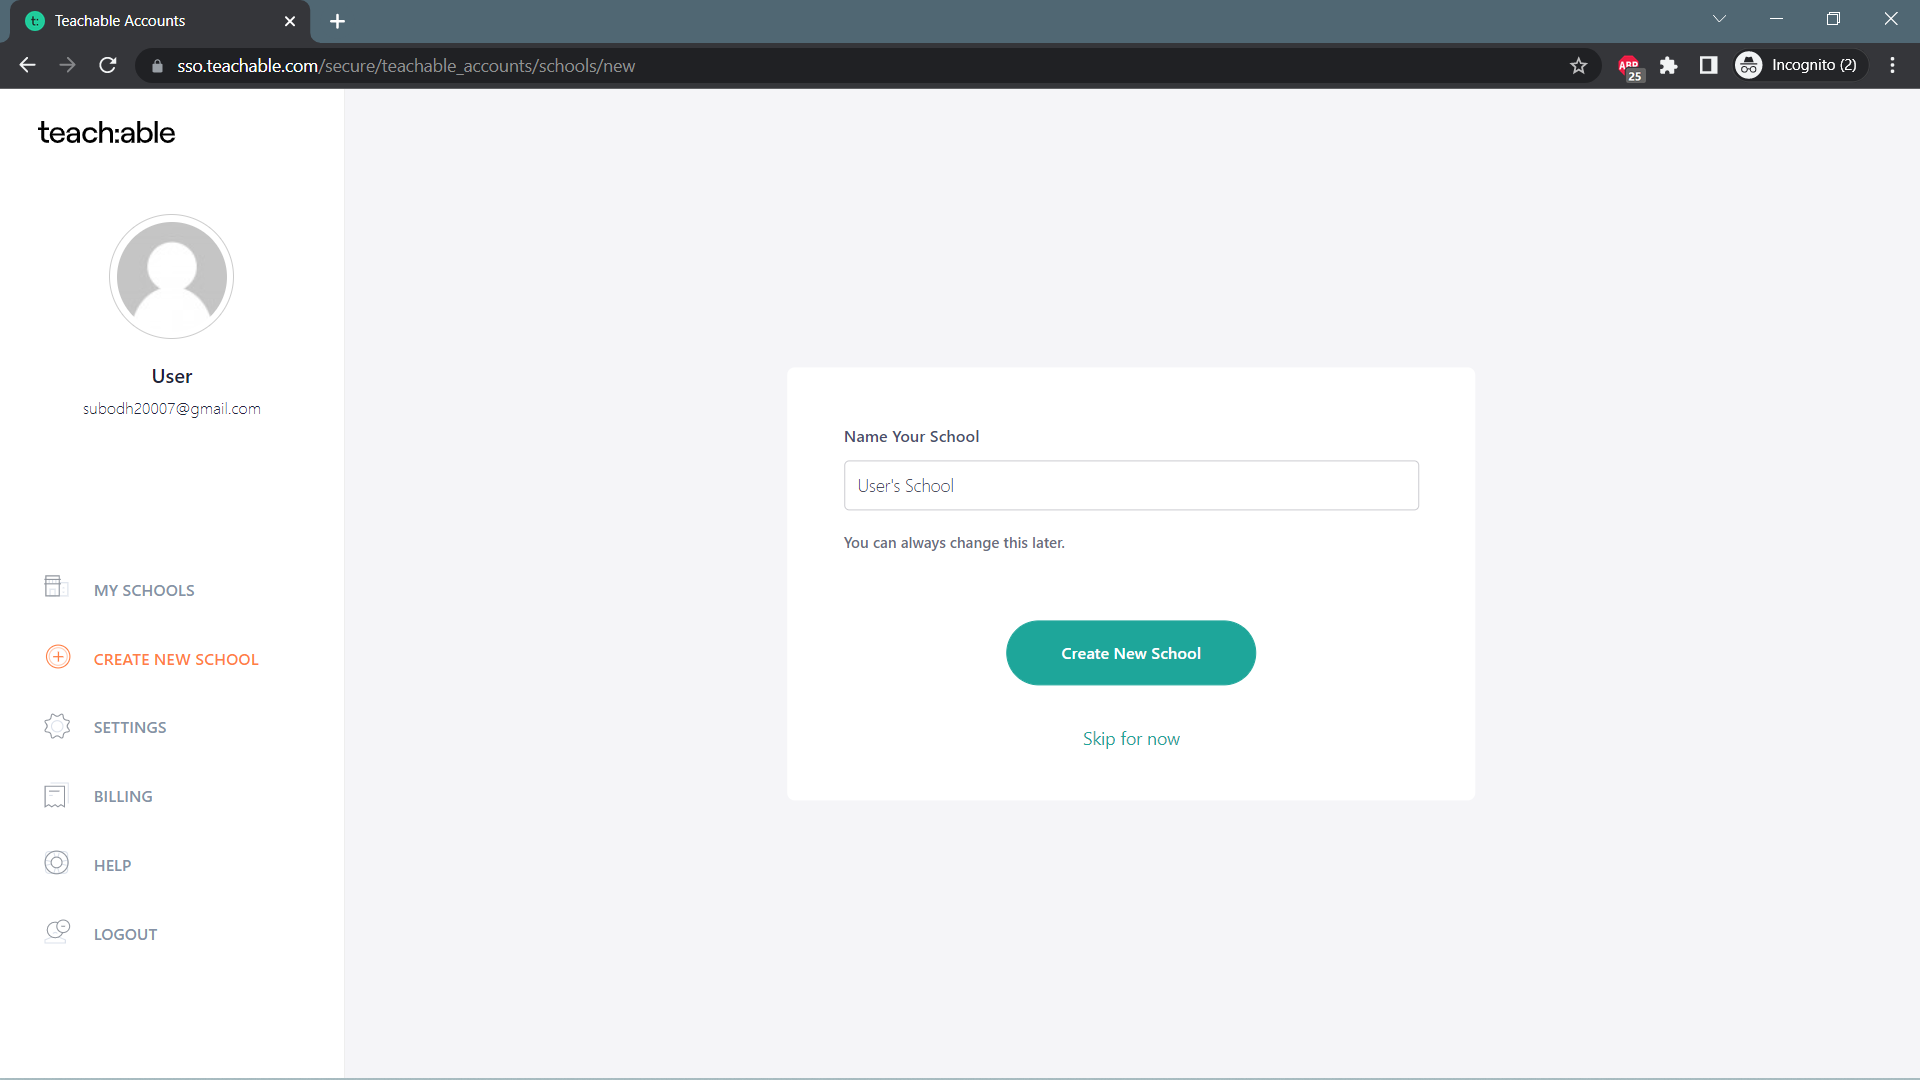
Step 2Create your school
You’ll land on a page asking you to create your school. Fill in a few details to create it.
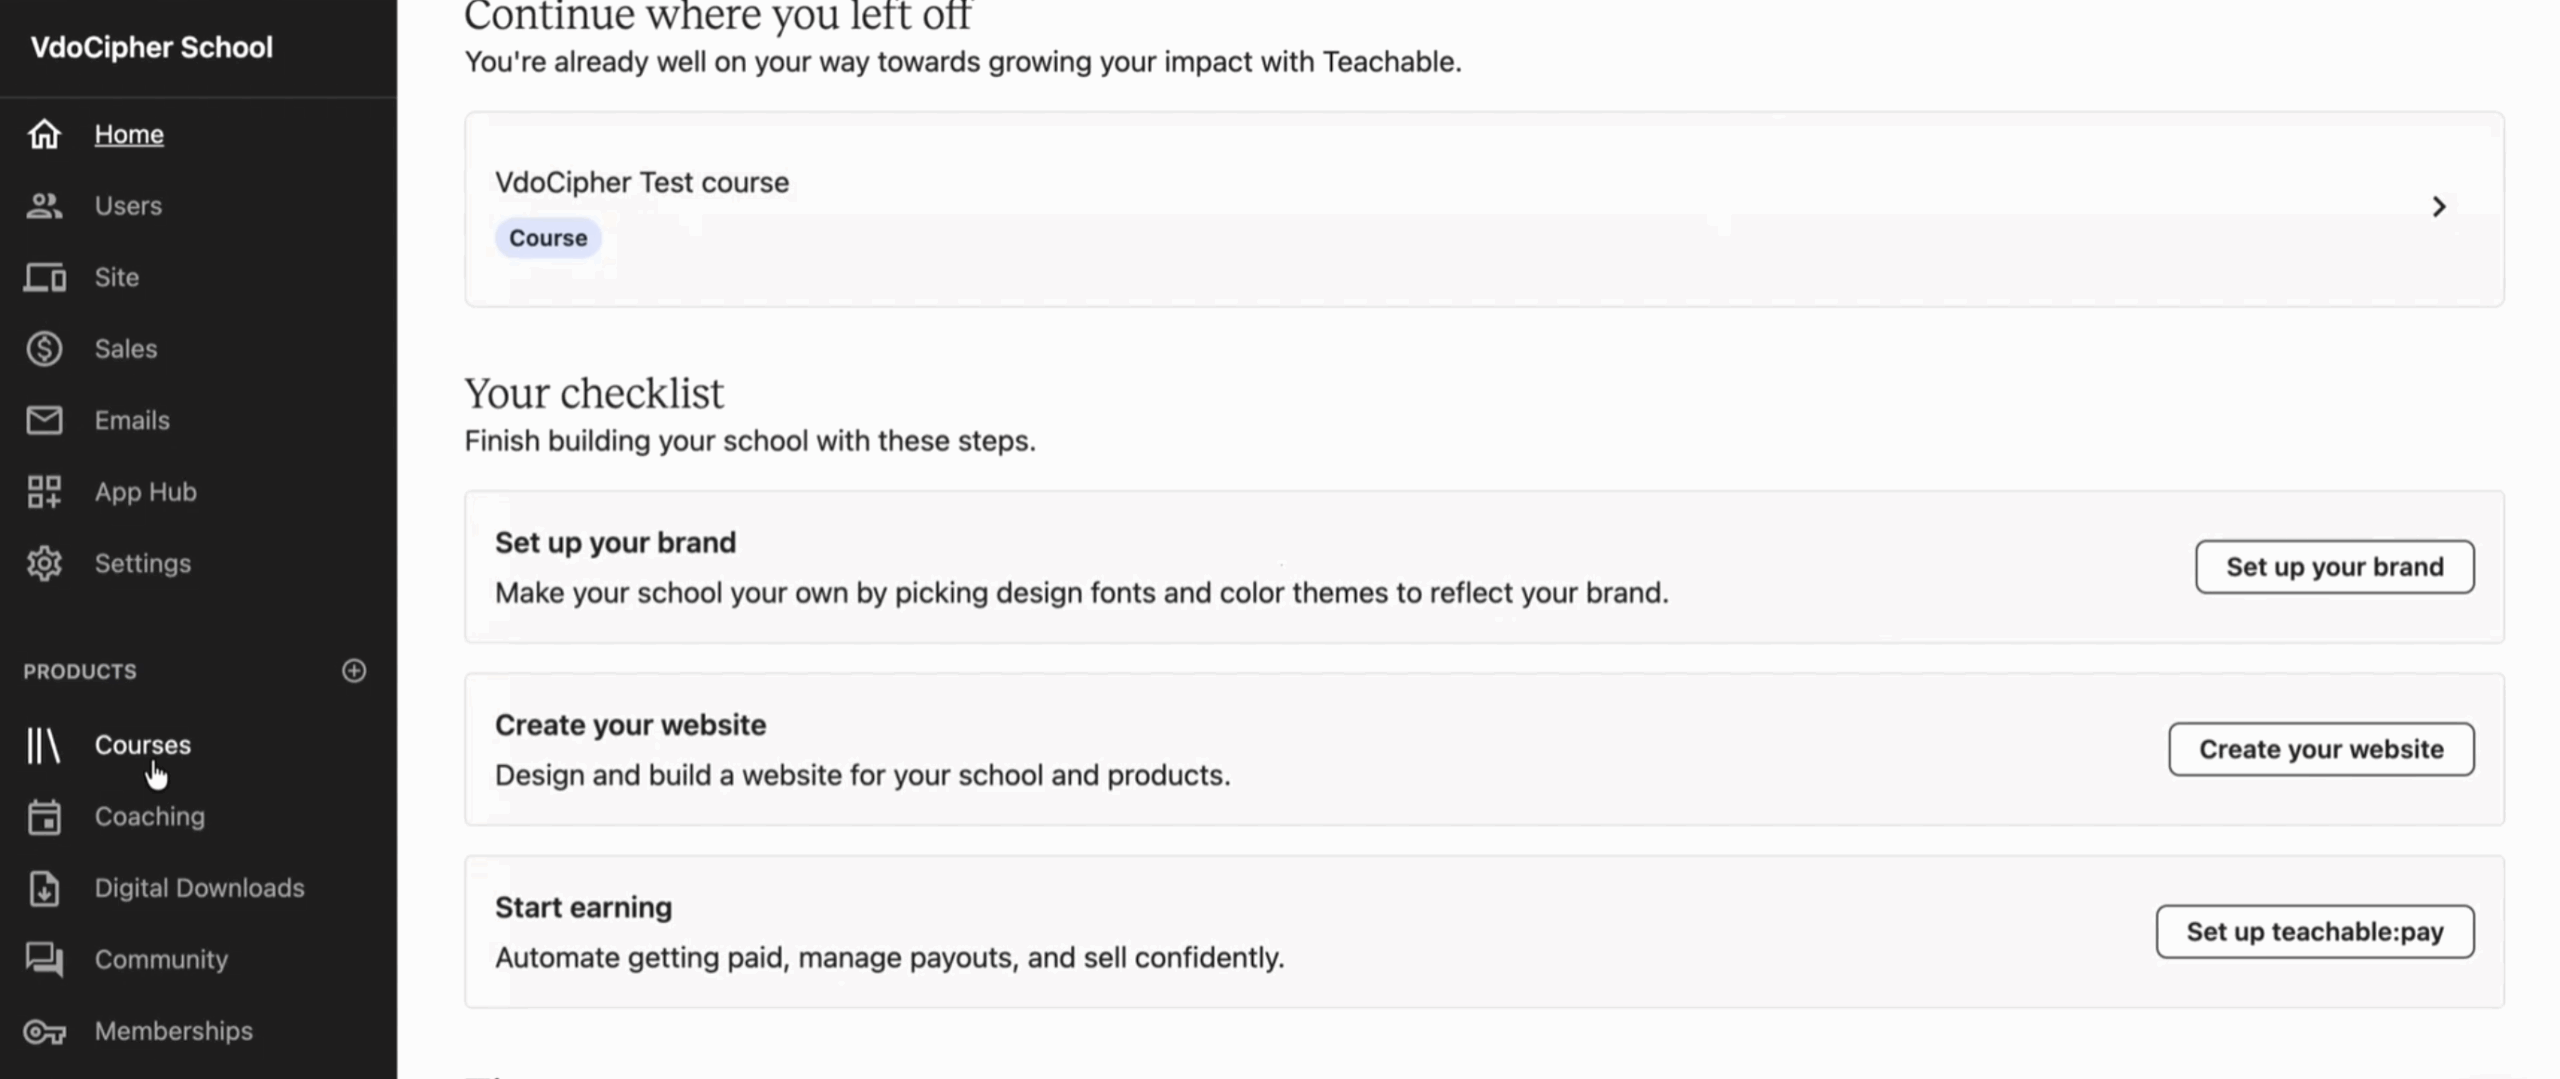
Step 3Open “Courses” from the left panel
From your school dashboard, select “Courses” from the left panel to get started.
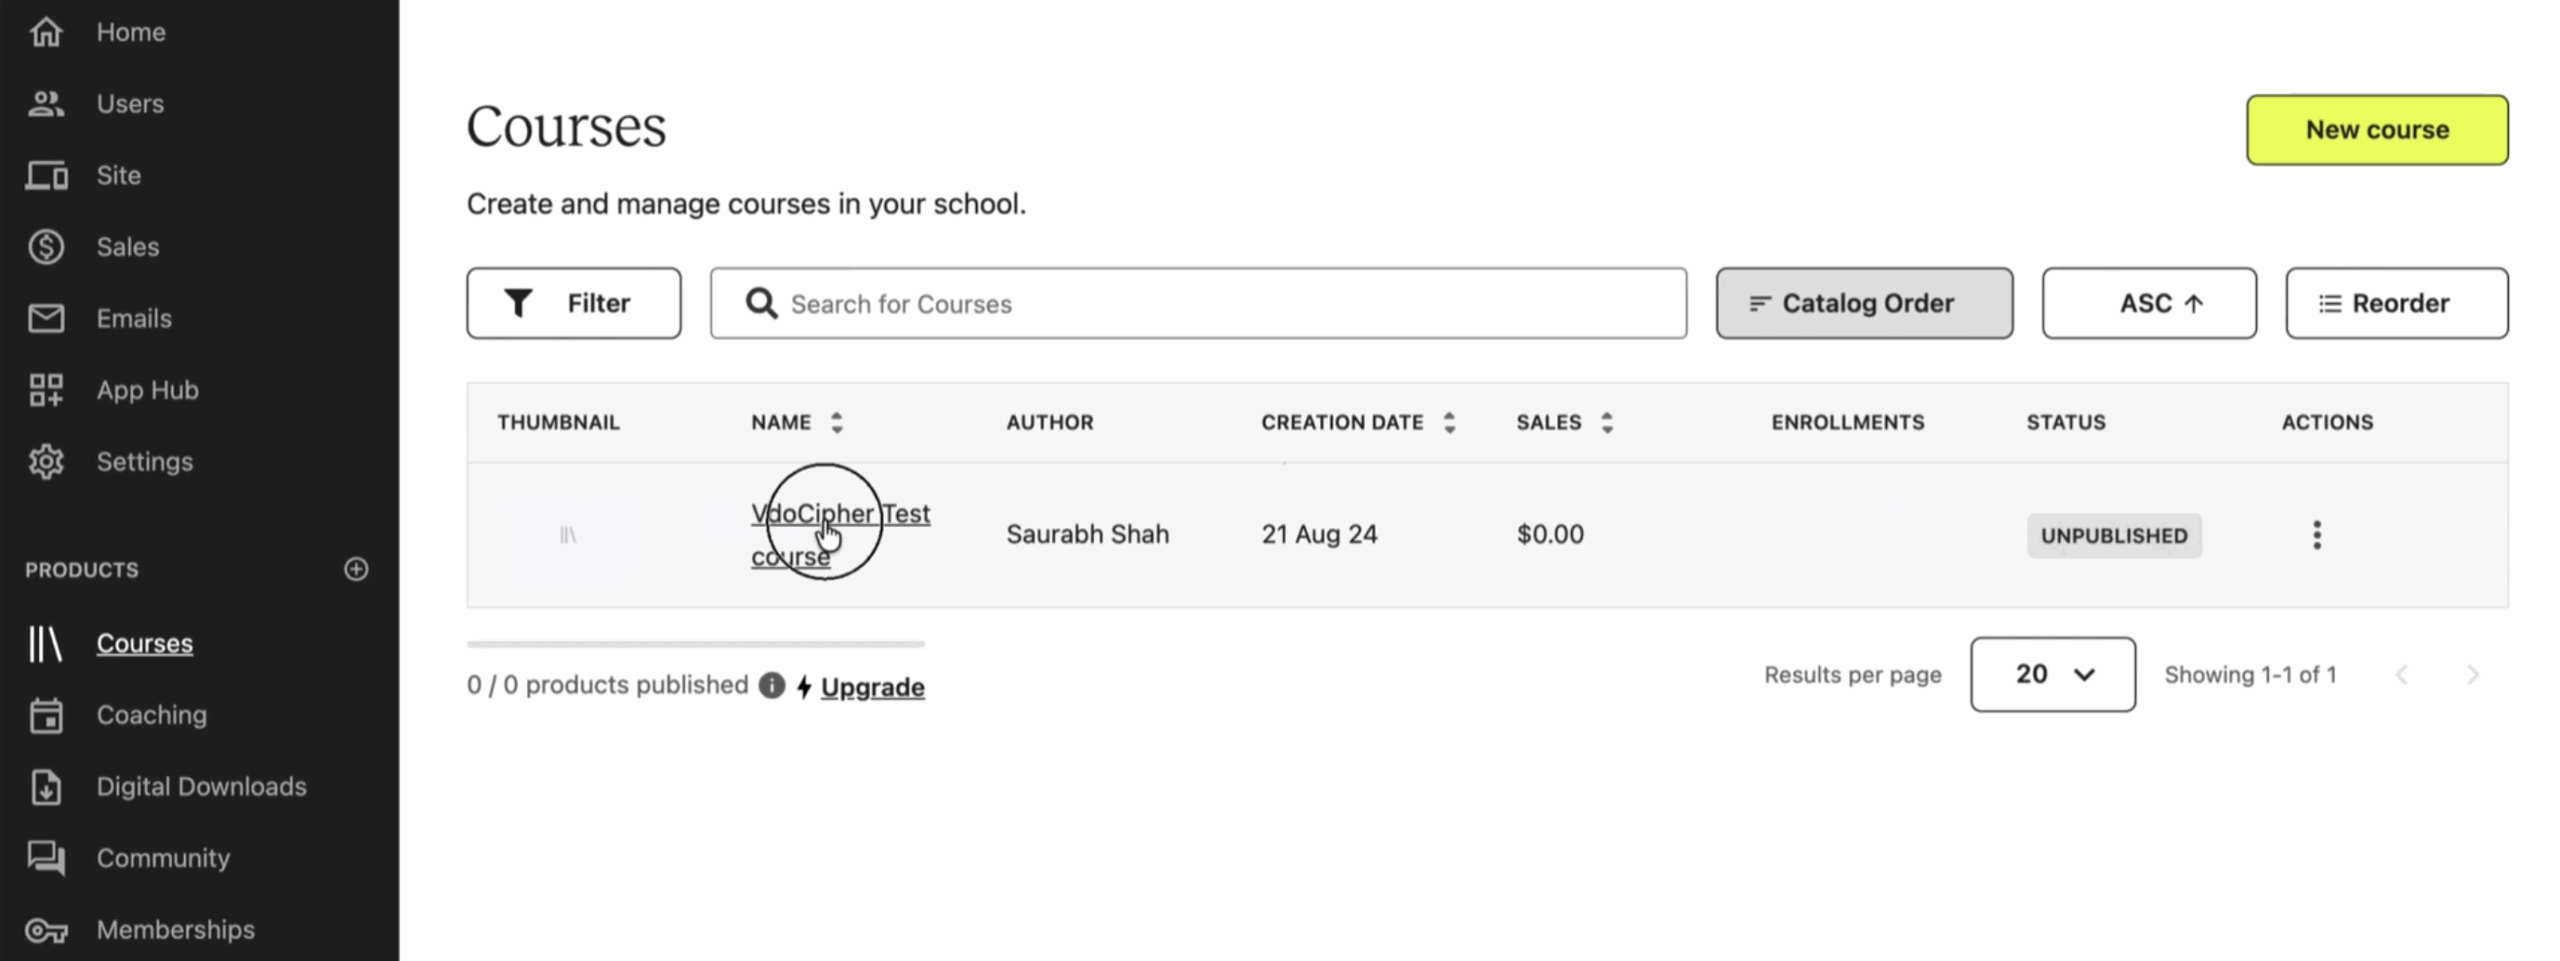
Step 4aSelect an existing course (or create one)
On the courses dashboard you’ll see all your courses. If you haven’t created one yet, click “New Course”. Otherwise, select an existing one.
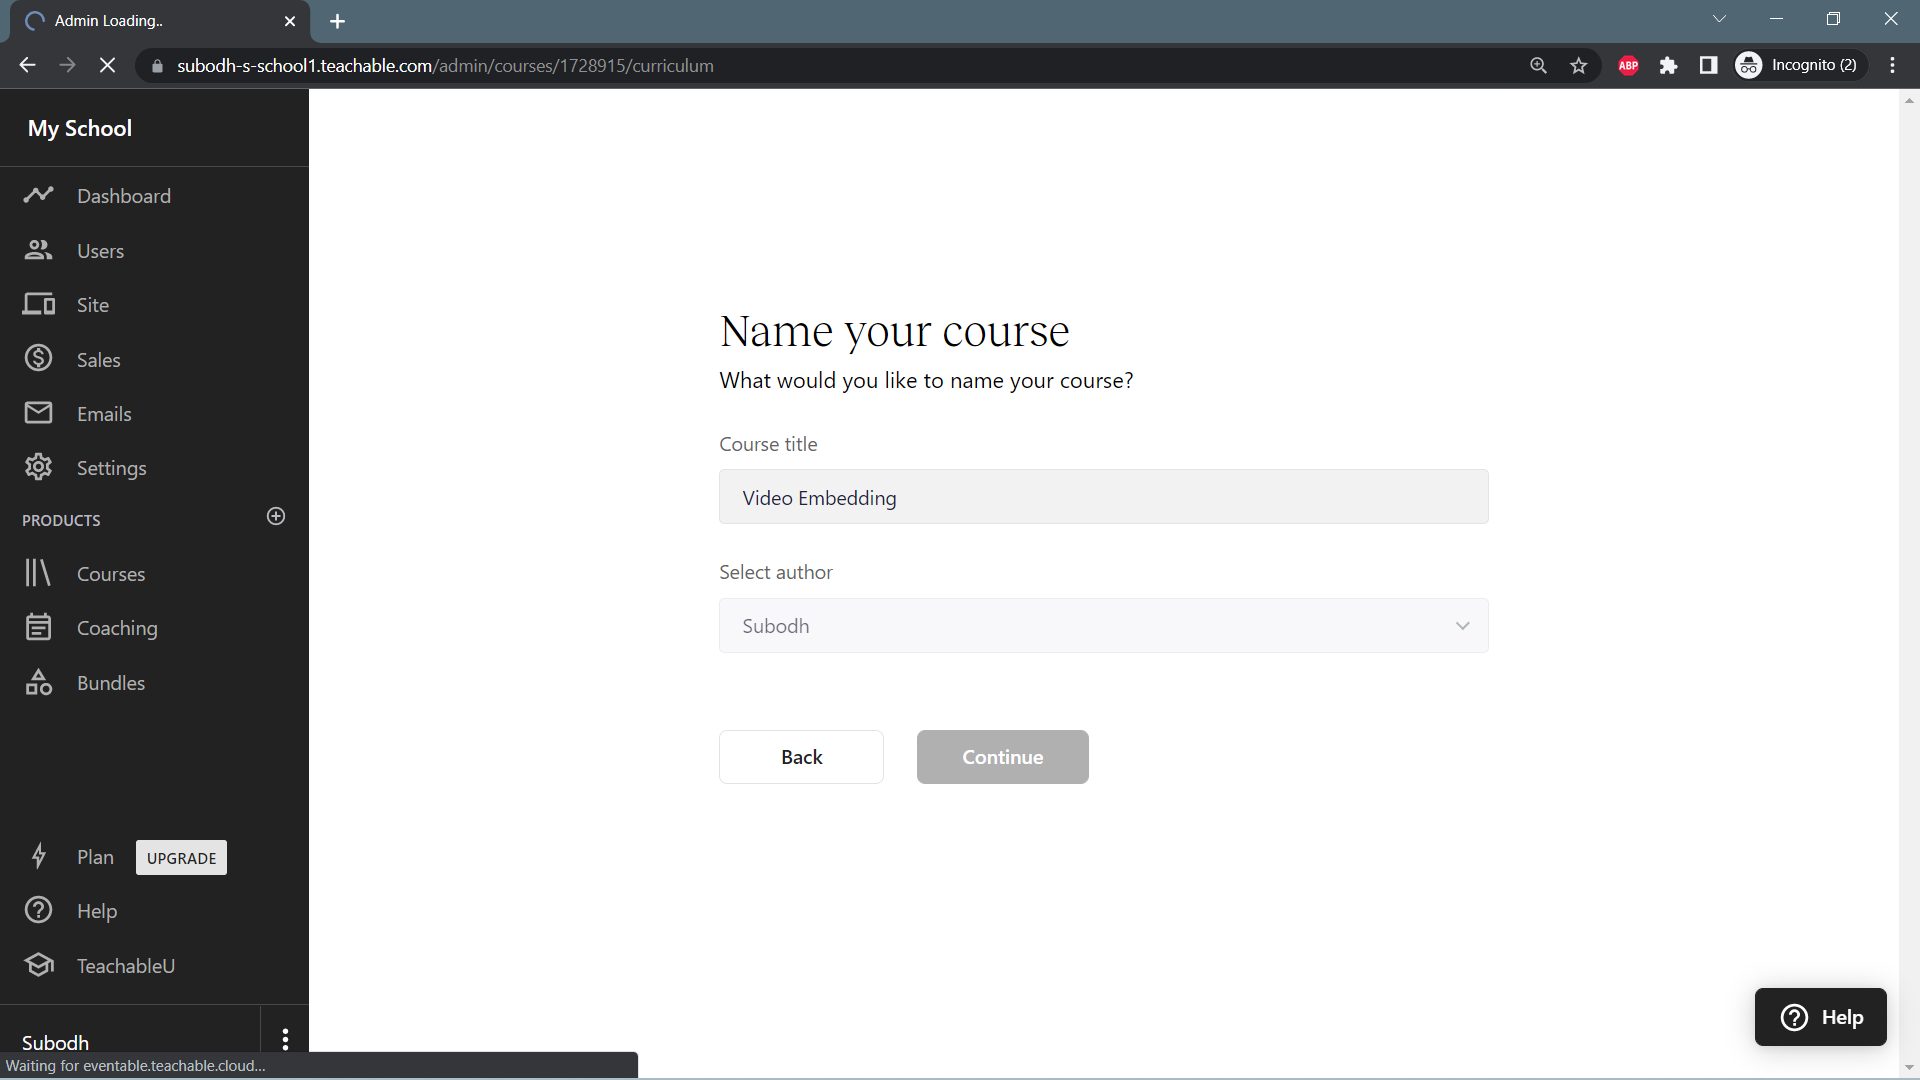
Step 4bCreate a new course
Name the course, select an author, click continue — your course is created.
Step 5Open the lecture where you want to embed the video
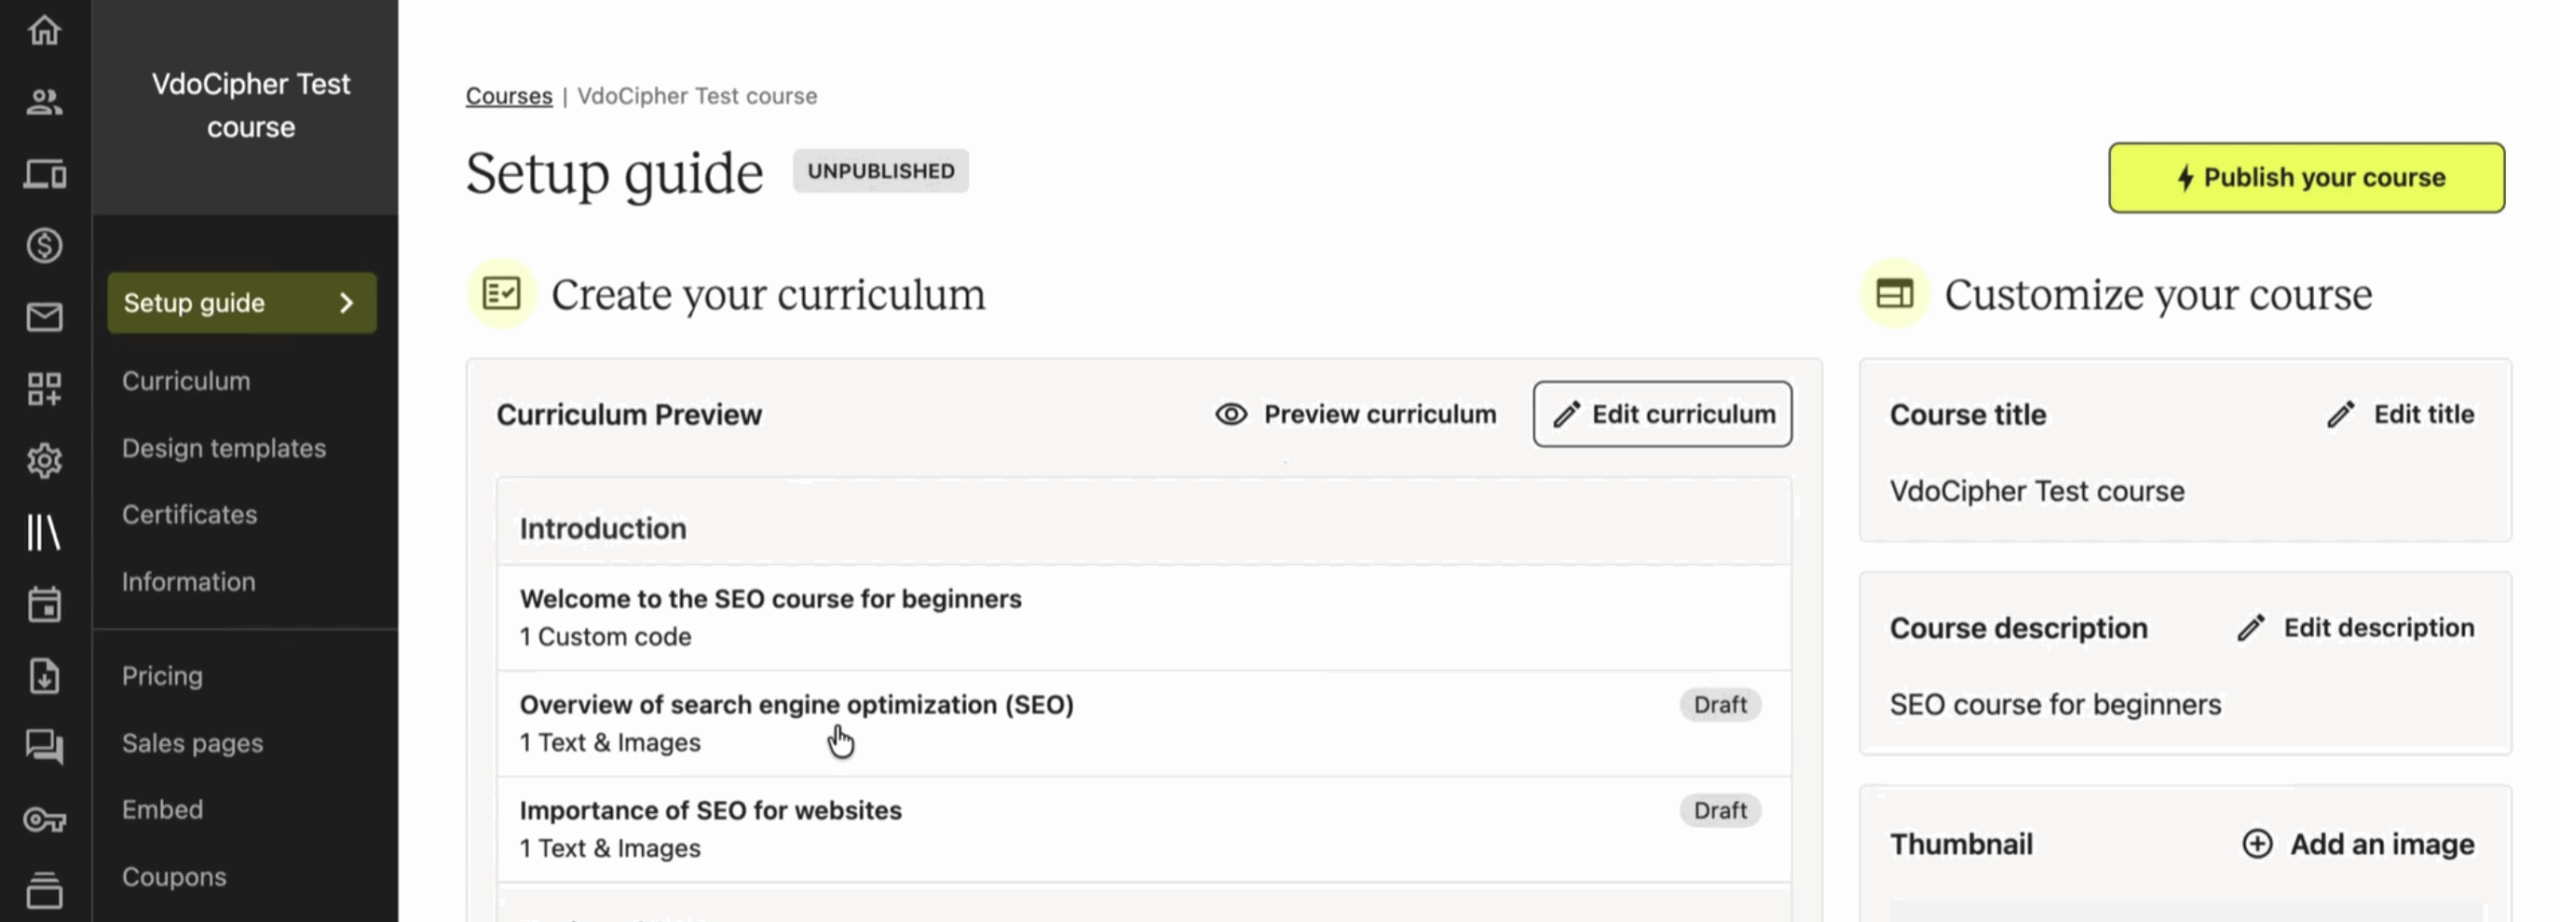
Step 6Click “Add Content” → “Custom Code”
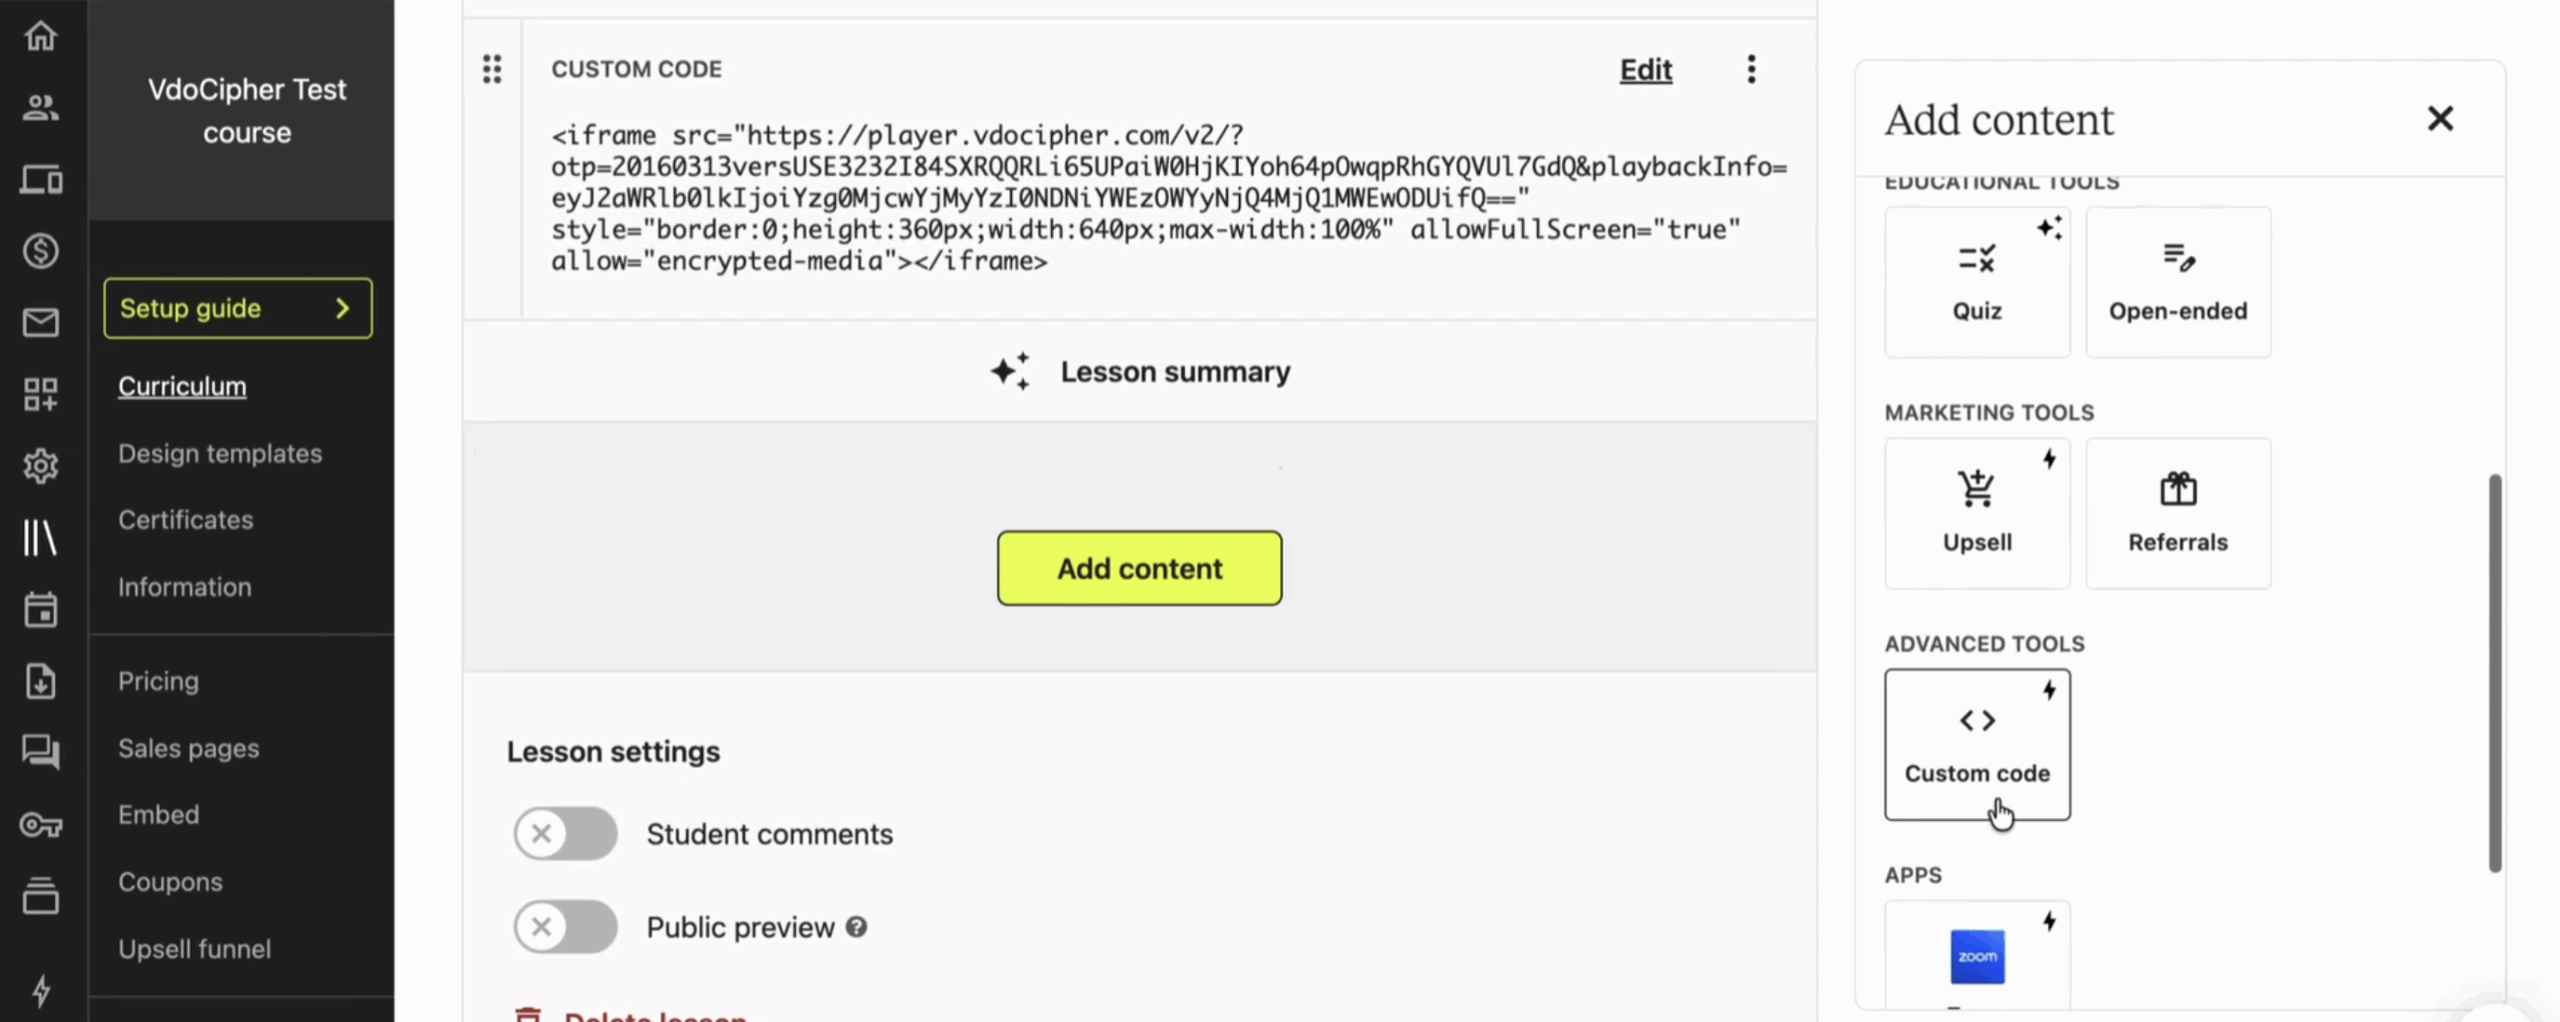
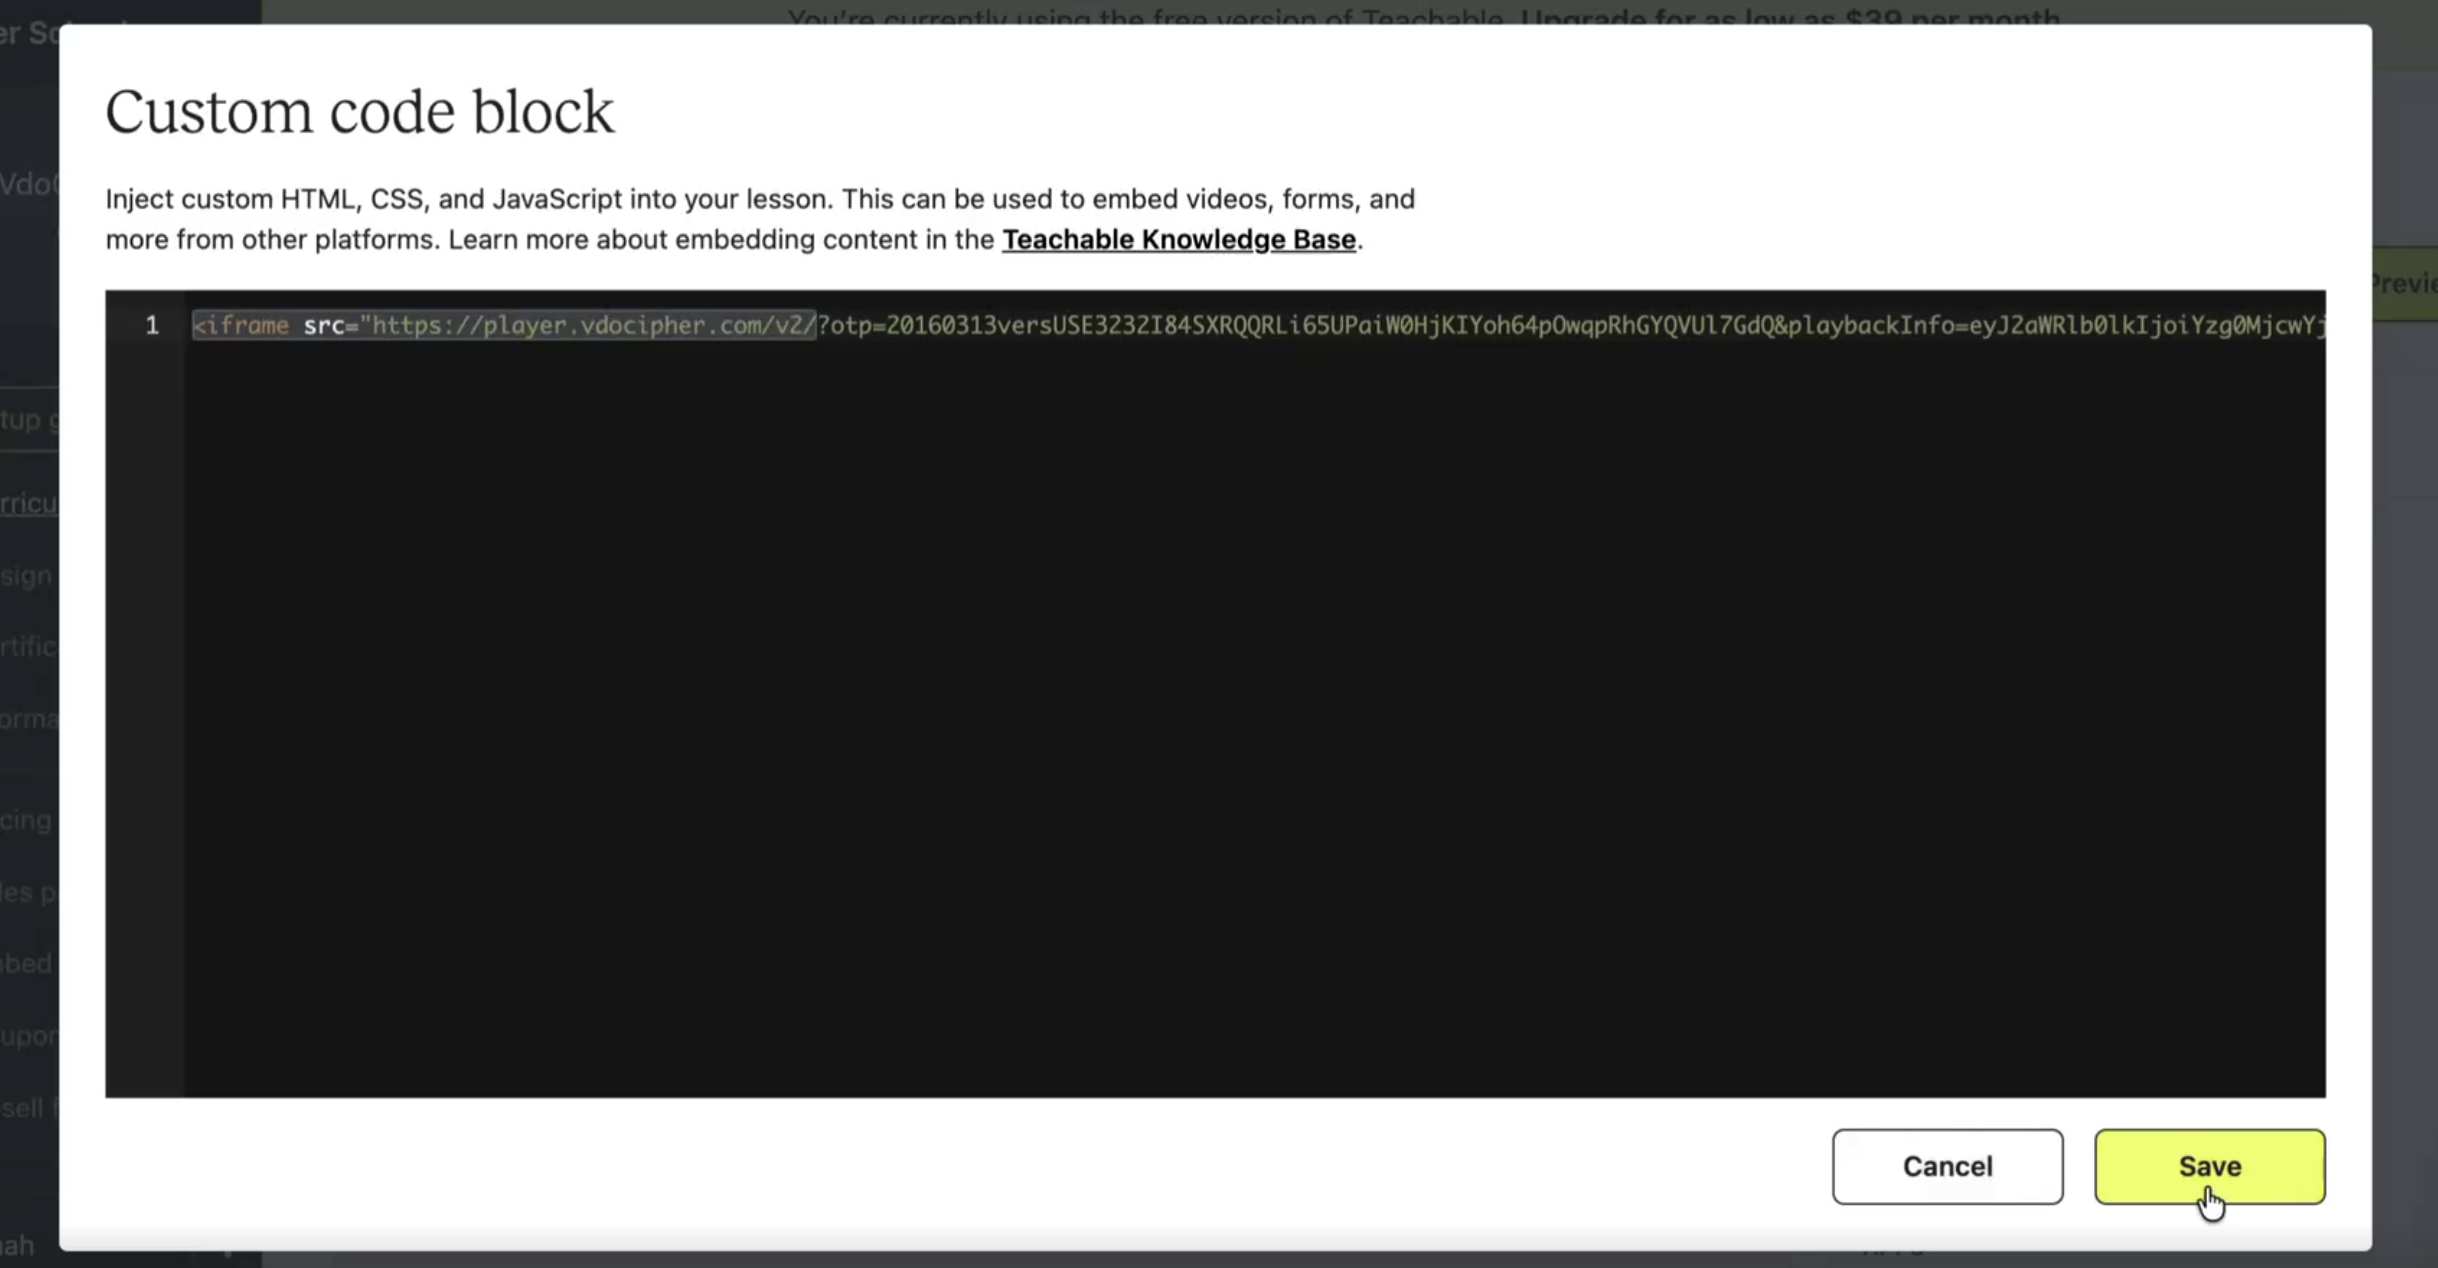
Step 7Copy the iframe code from the VdoCipher dashboard
Step 8Paste the code in the Custom Code block and save
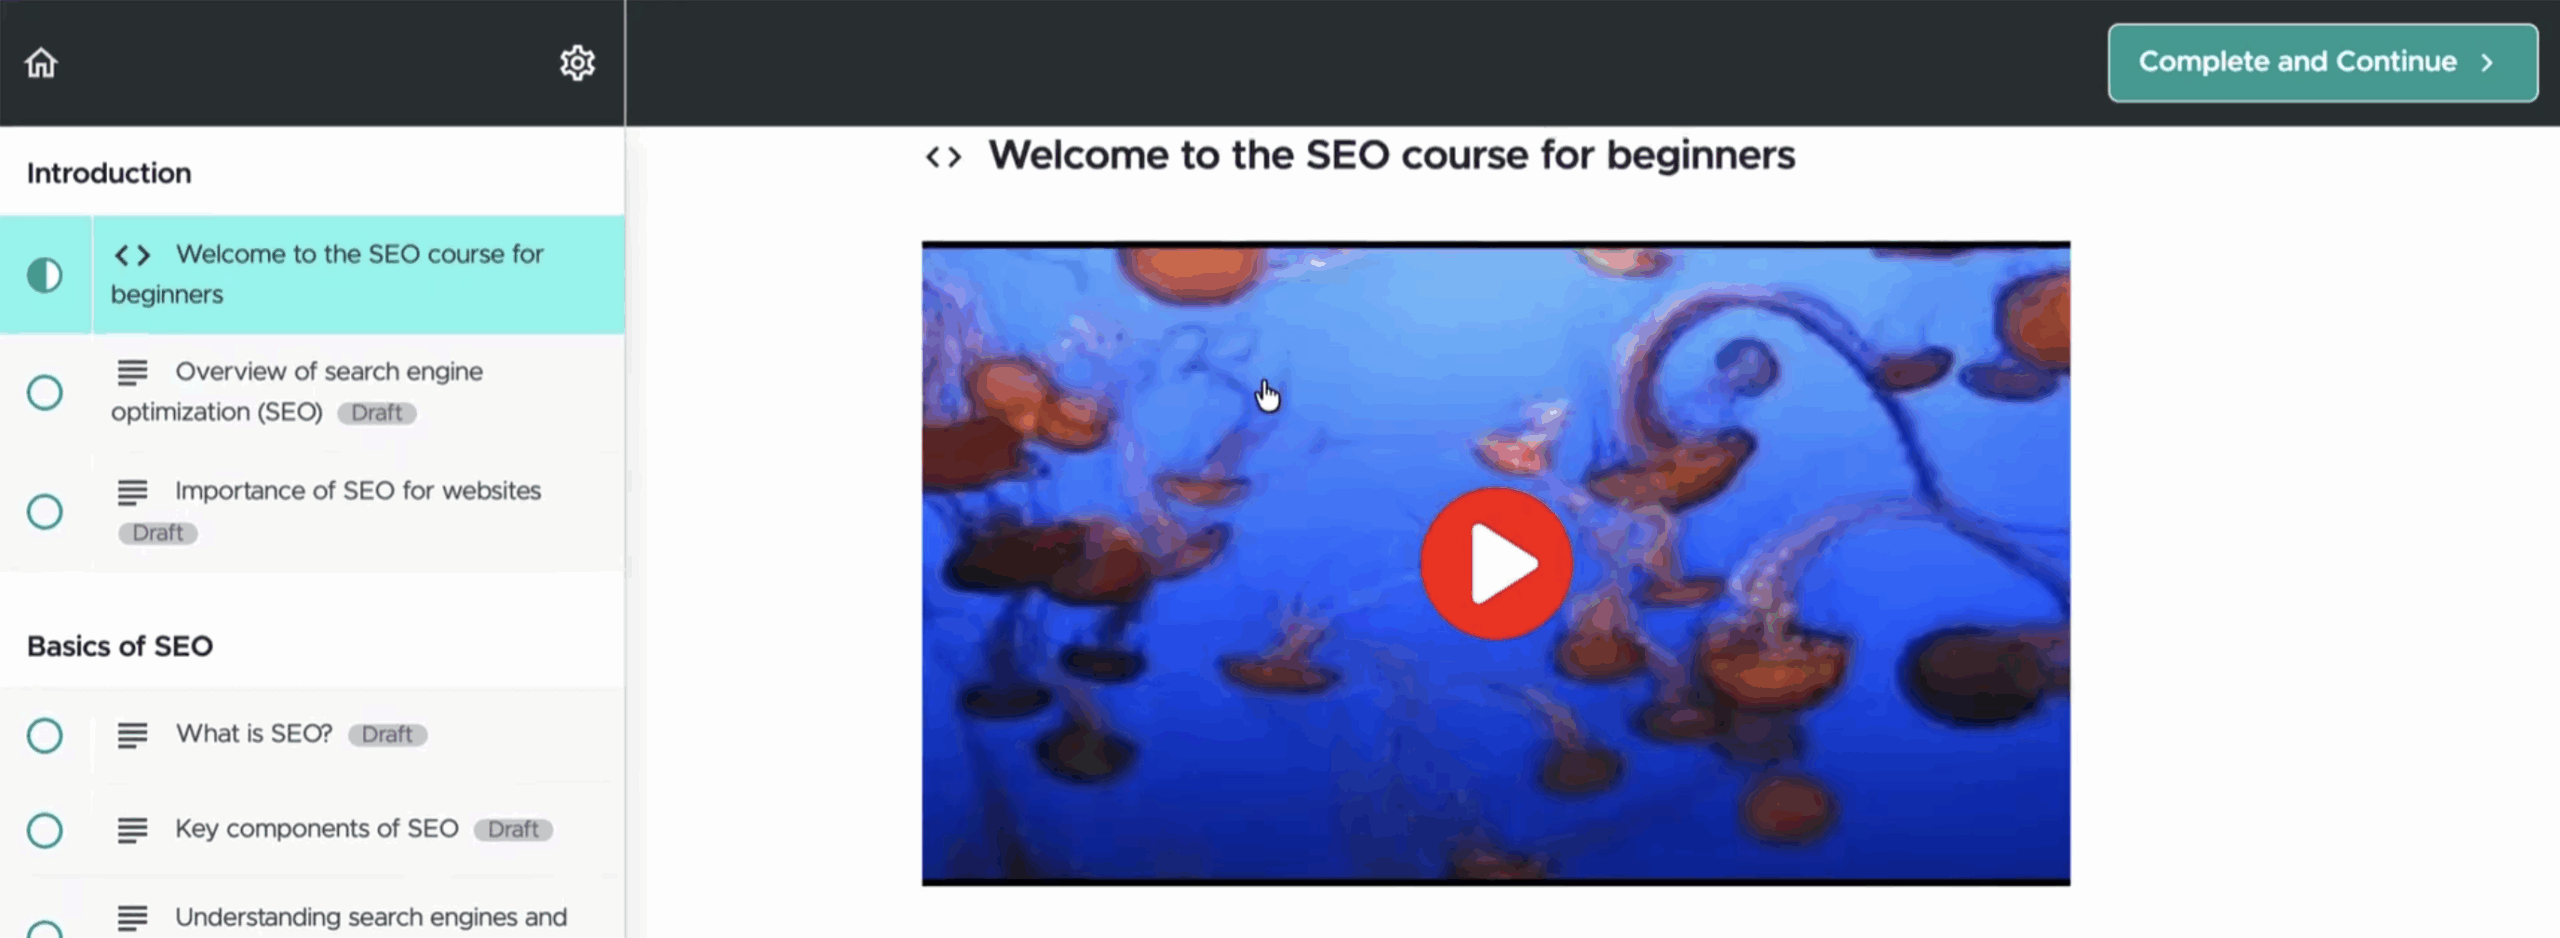
Step 9Preview your lesson
View your lesson and you’ll see your embedded video with all your chosen settings.
3Embedding on Any HTML Editor (WordPress example)
The best way to embed on WordPress is via the VdoCipher WordPress plugin + shortcode, not the iframe. But in certain cases you may prefer the iframe even on WordPress. The steps below also generalize to other HTML editors.
Once you have your embed code, log into WordPress and open your post via the Classic Editor — some other editors can create unwanted issues.
Step 1Paste the code under the Text tab (not Visual)
Always place the embed code under the Text tab, not Visual. Going through the Visual tab can sometimes prompt you to install Flash or other plugins.
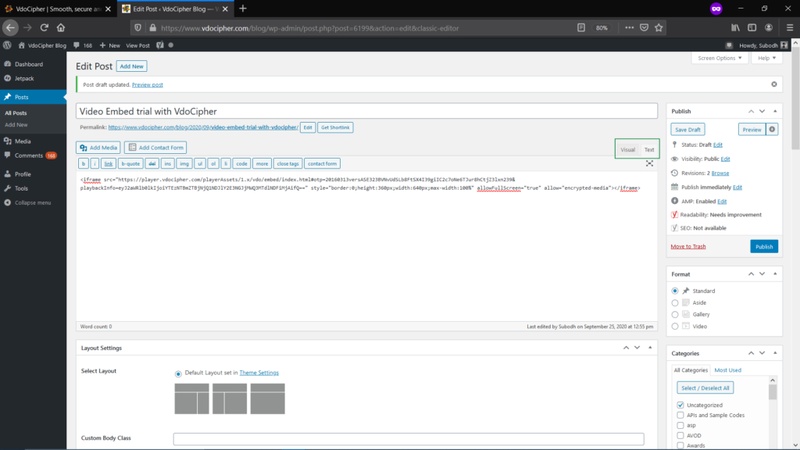
Step 2Preview your draft
After placing the code under the Text tab, preview your draft to confirm the embedded video plays correctly.
4Video Embed on Thinkific
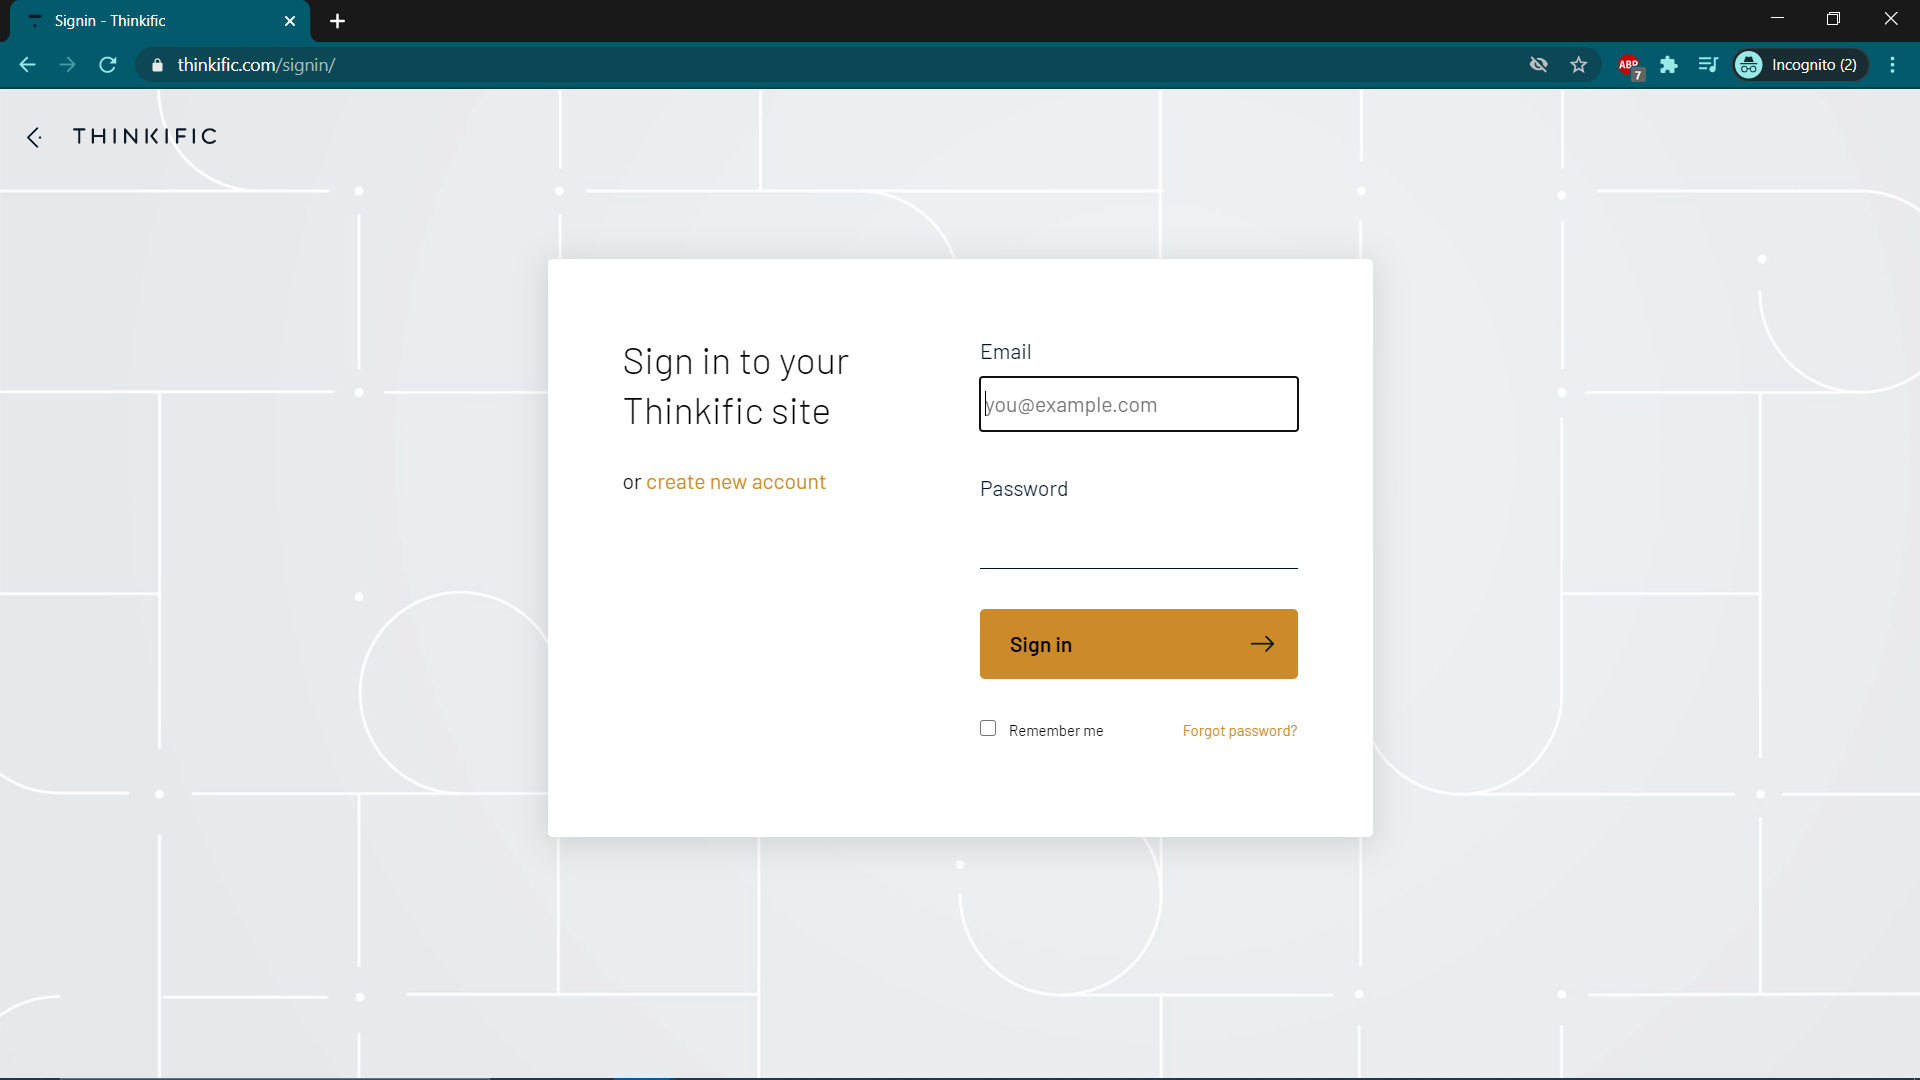
Step 1Visit thinkific.com and create / log into your account
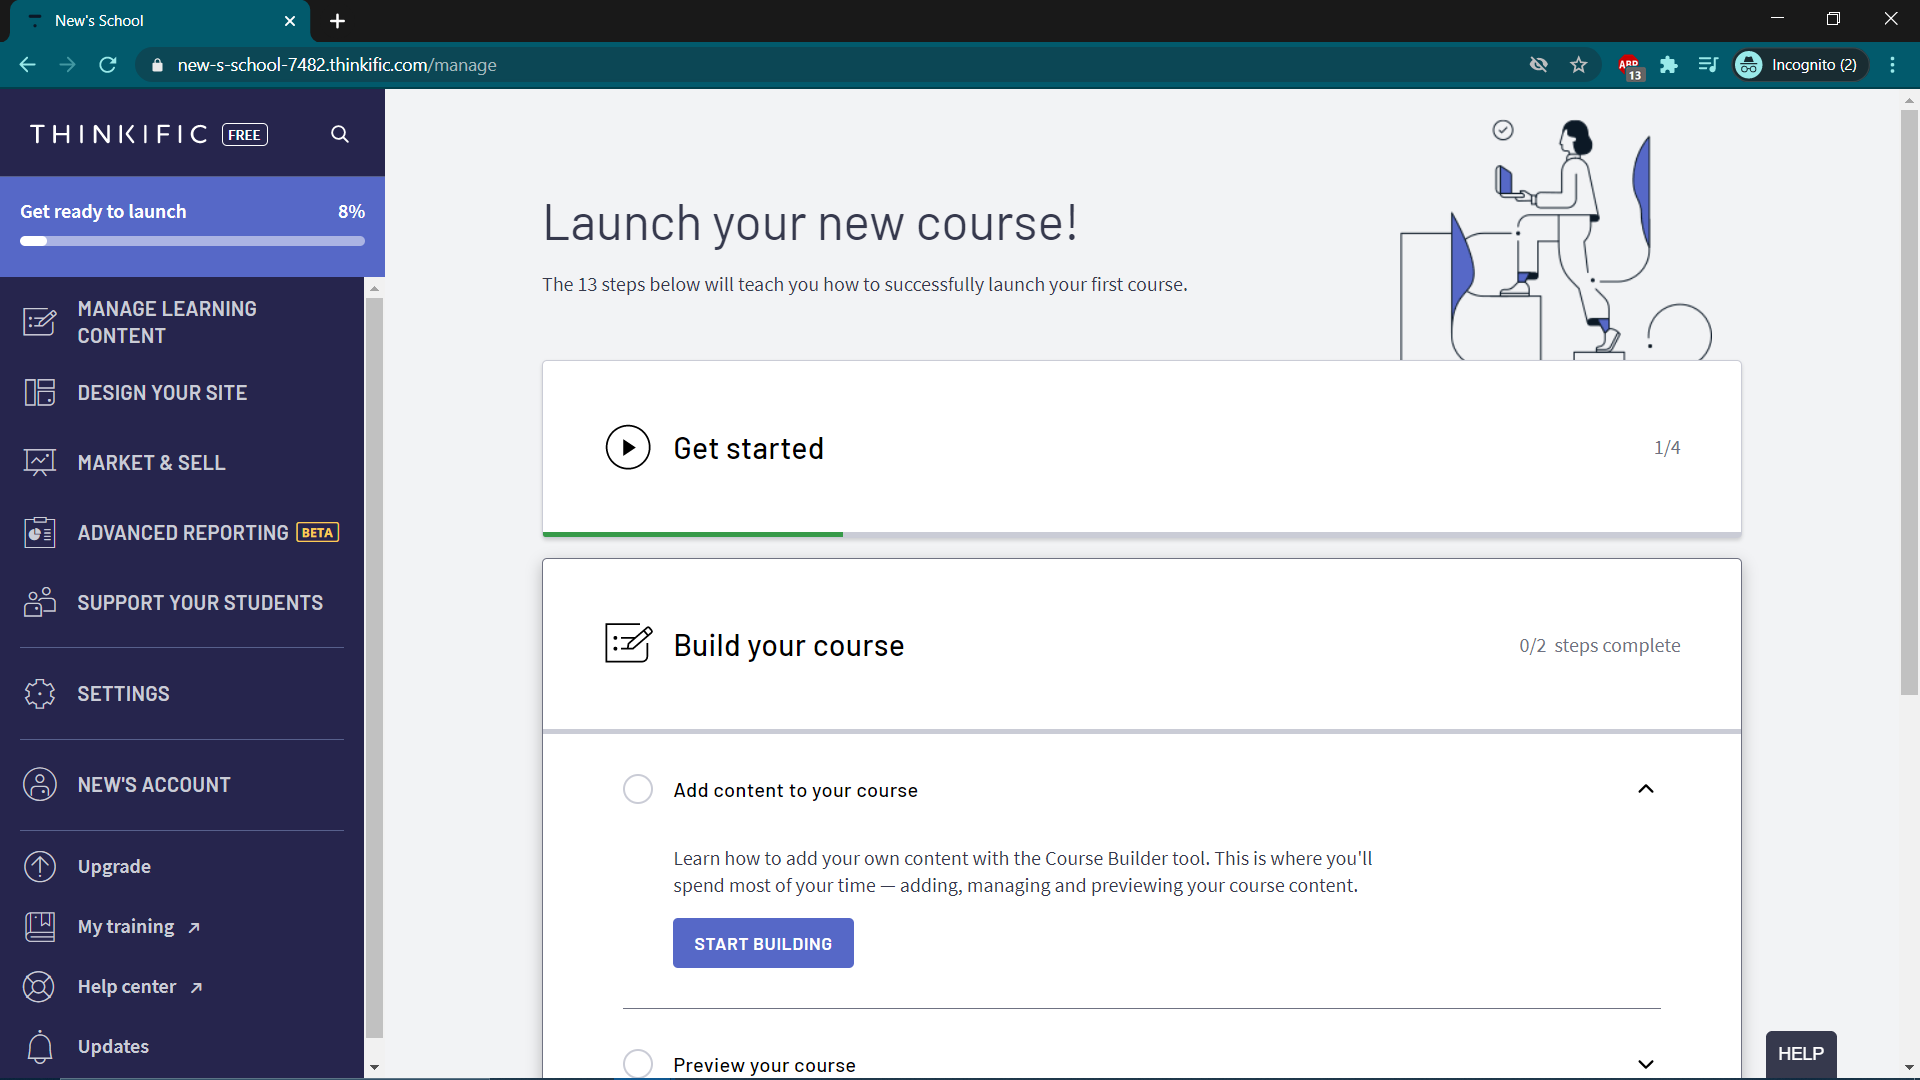
Step 2Click “Start Building” on the dashboard
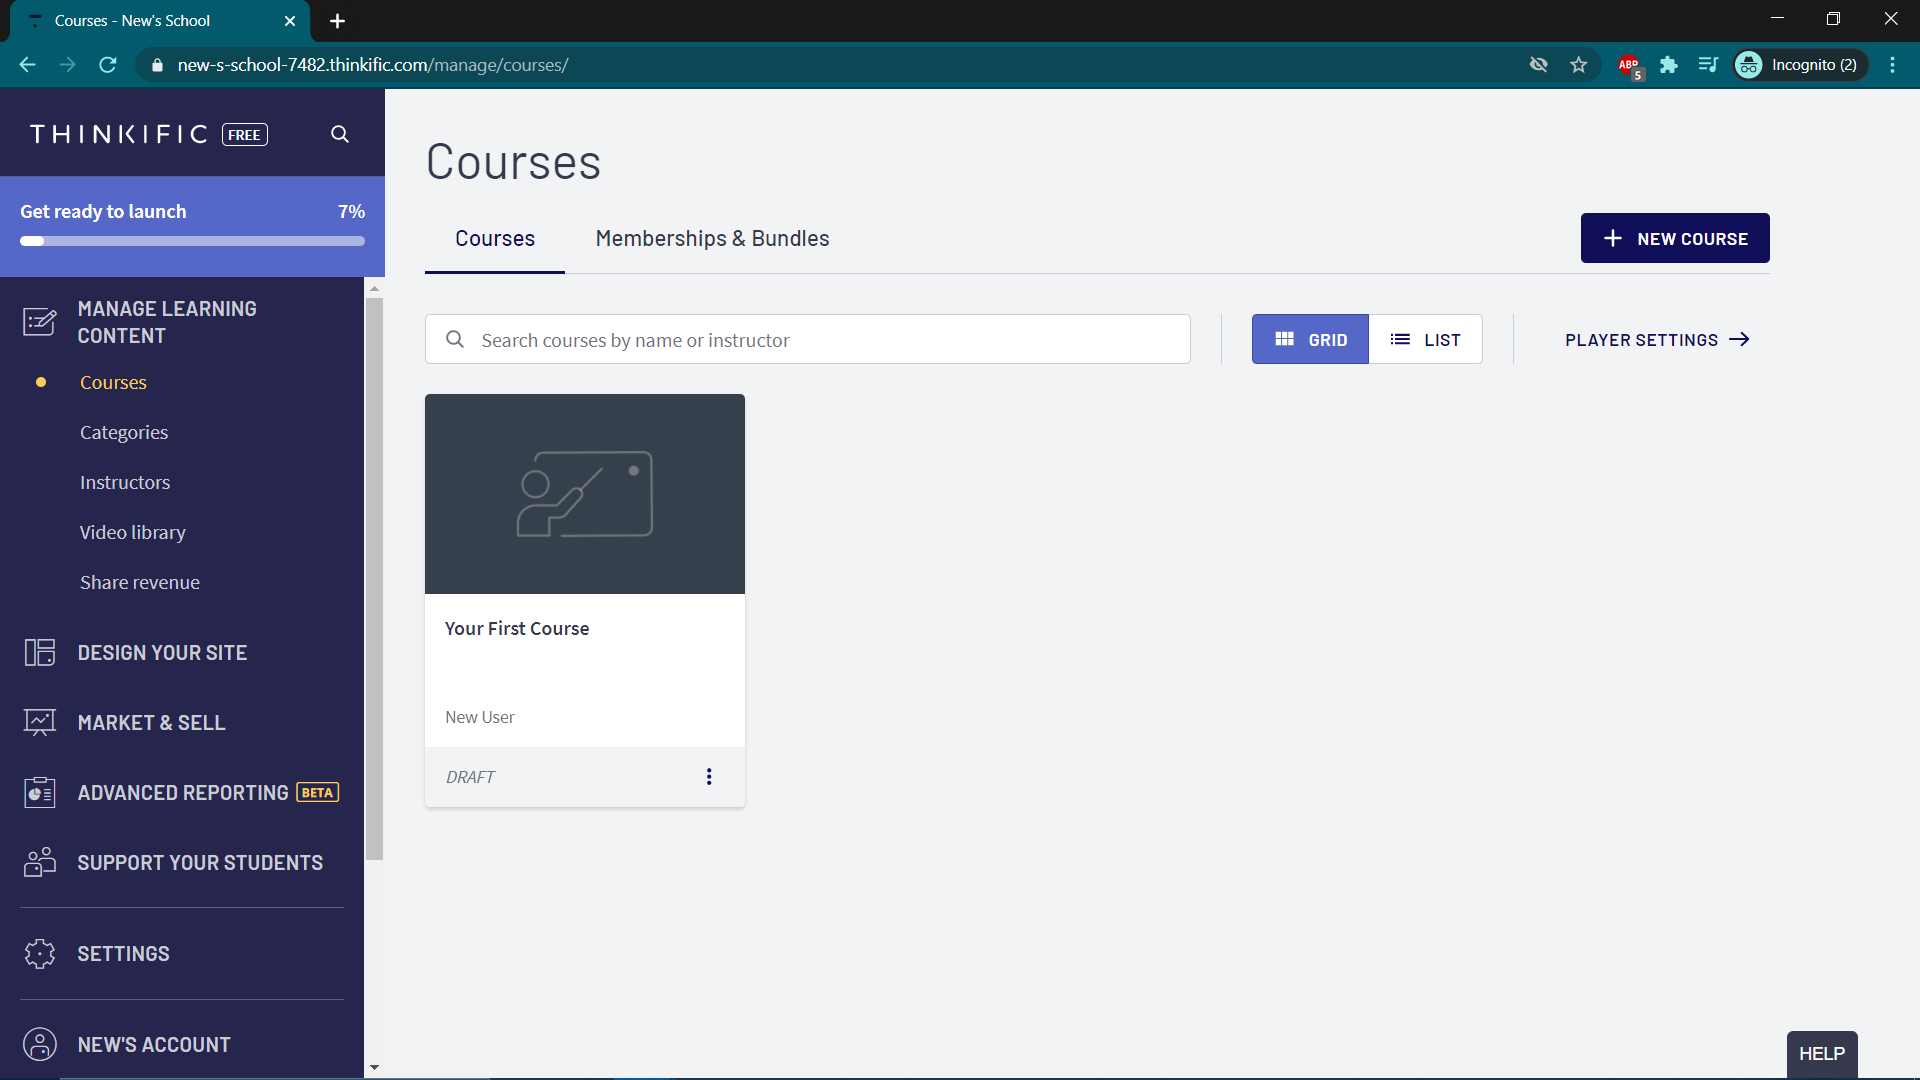
Step 3Open your course and start creating a new lesson
Step 4Click “Add Lesson”
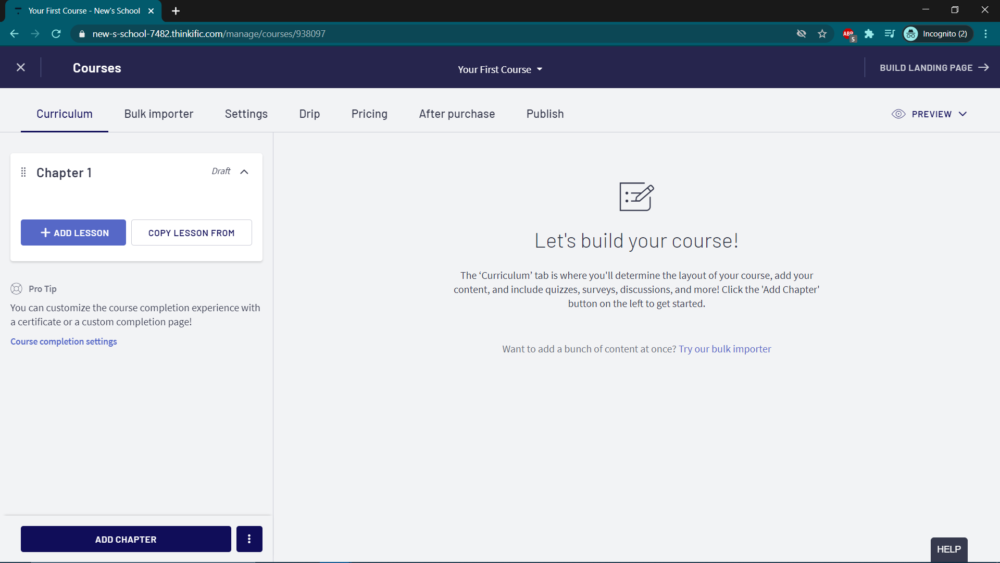
Step 5Choose “Text” lesson type
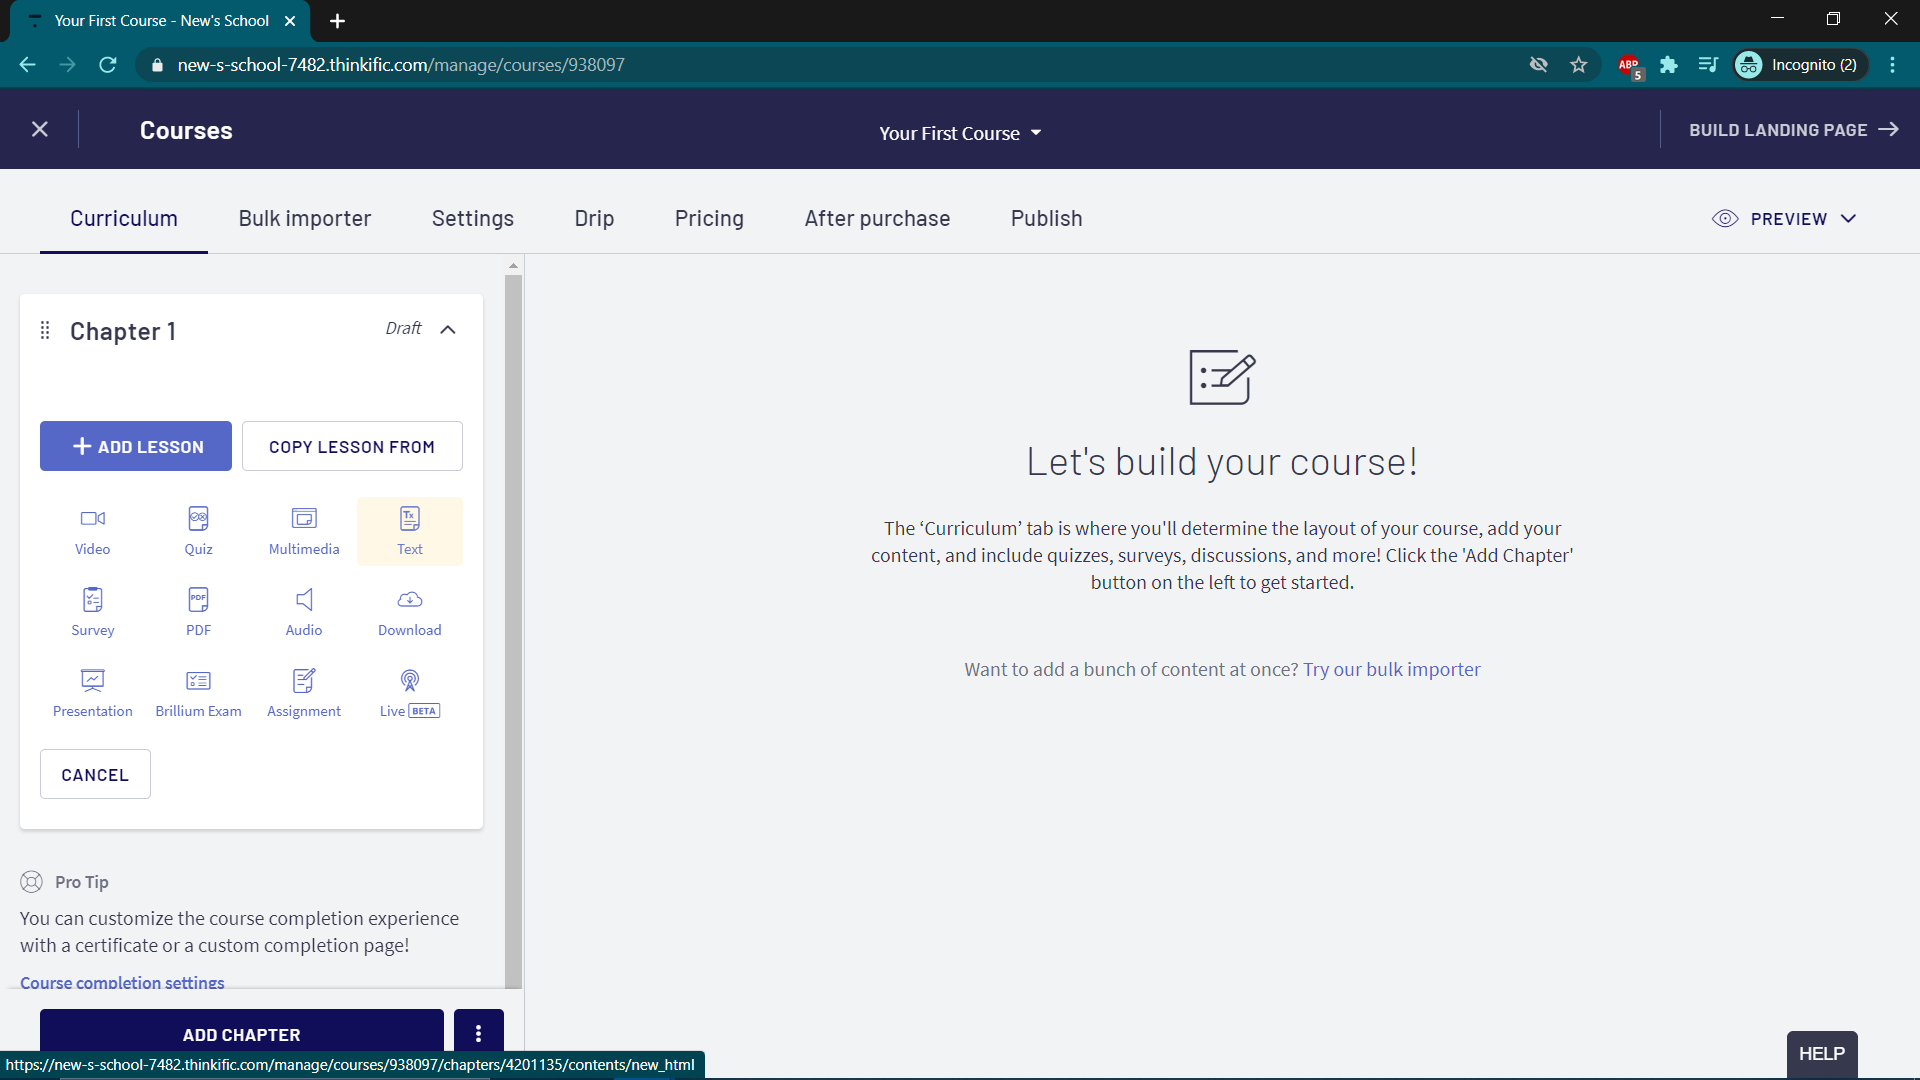
Step 6Click “Code View” and paste your iframe
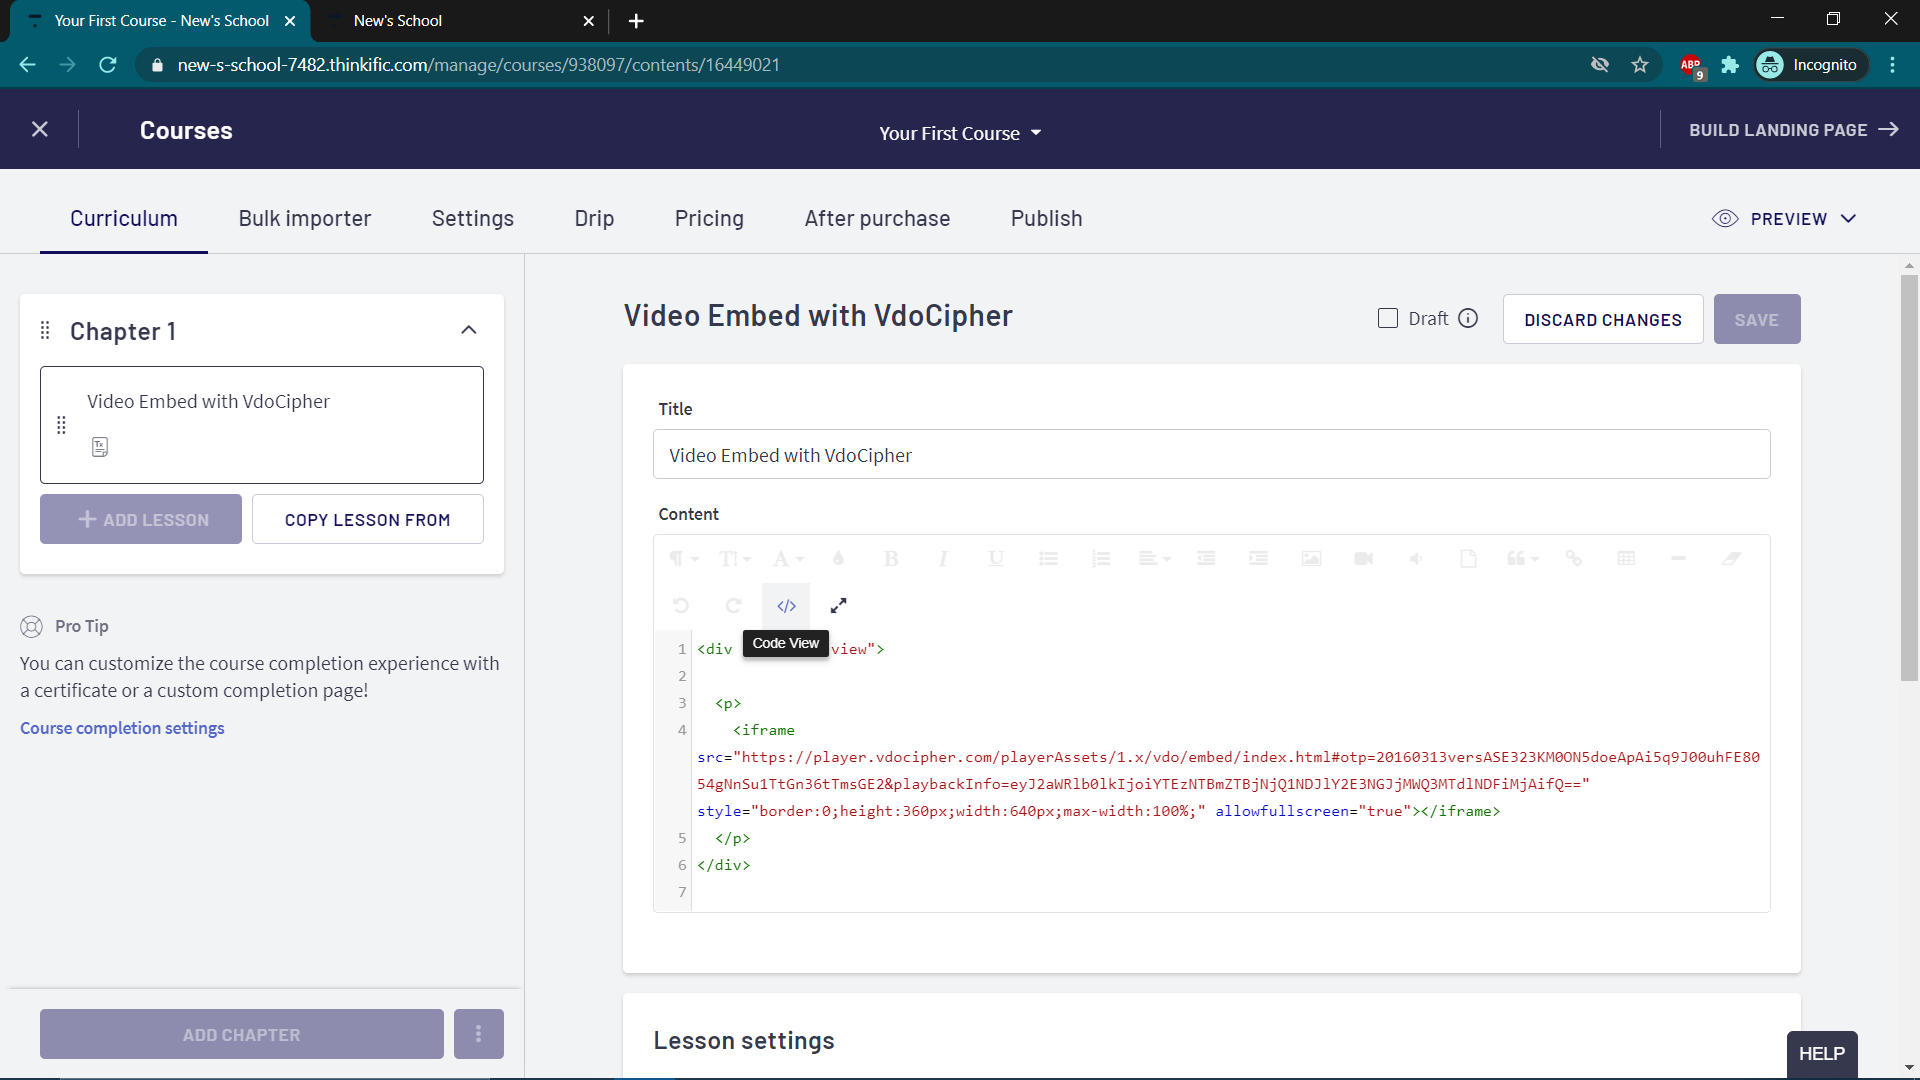
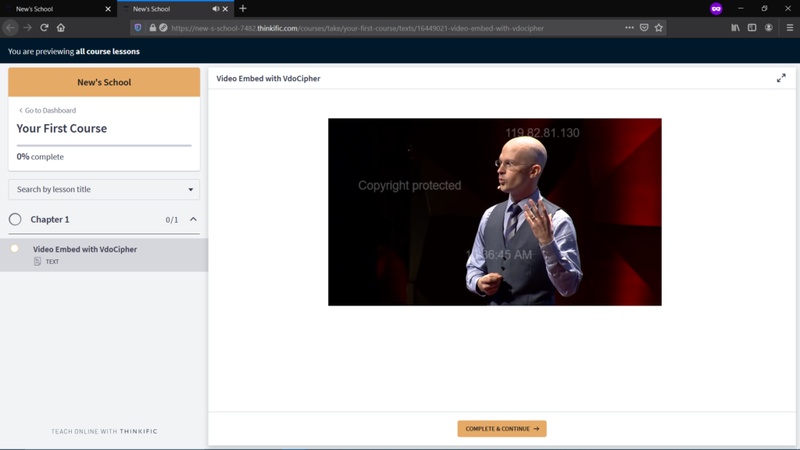
Step 7Save and preview
Click save, then preview from the top-right corner. Your video will be embedded with all your chosen settings.
Reason for Errors in Iframe with Some Platforms
Sample iframe:
<iframe src="https://player.vdocipher.com/v2/?otp=20160313versIND313AMlFYwHZm80vw6MLcSo64oDQMqPMNYh3L8w22zEEWjw5Bj&playbackInfo=eyJ2aWRlb0lkIjoiMDk4NDhkM2JkMTIyNDAwZTlmNWMyNTliOTE1OGQ1ODMifQ==" style="border:0;height:360px;width:640px;max-width:100%" allowFullScreen="true" allow="encrypted-media"></iframe>
What to watch for
Most platforms like Teachable publish the iframe as-is. Some editors, however, strip the highlighted
allow="encrypted-media" attribute on save — which breaks playback. If your video isn’t loading, re-open the source and confirm that attribute is still present.